下面的过程详细记录了如何实现第一个自定义的nginx模块,对nginx入门者包括我很有参考价值,特记录如下。
前提
假定以root身份已经在CentOS 6.8 x86上
创建第三方子模块所在目录
mkdir -p /usr/local/src/nginx_modules_demo/ngx_http_mytest_module
在里面放入如下文件,内容参见文章末尾
ngx_http_mytest_module.c
config

关闭nginx
/usr/local/nginx/sbin/nginx -s quit
ps auxf | grep nginx
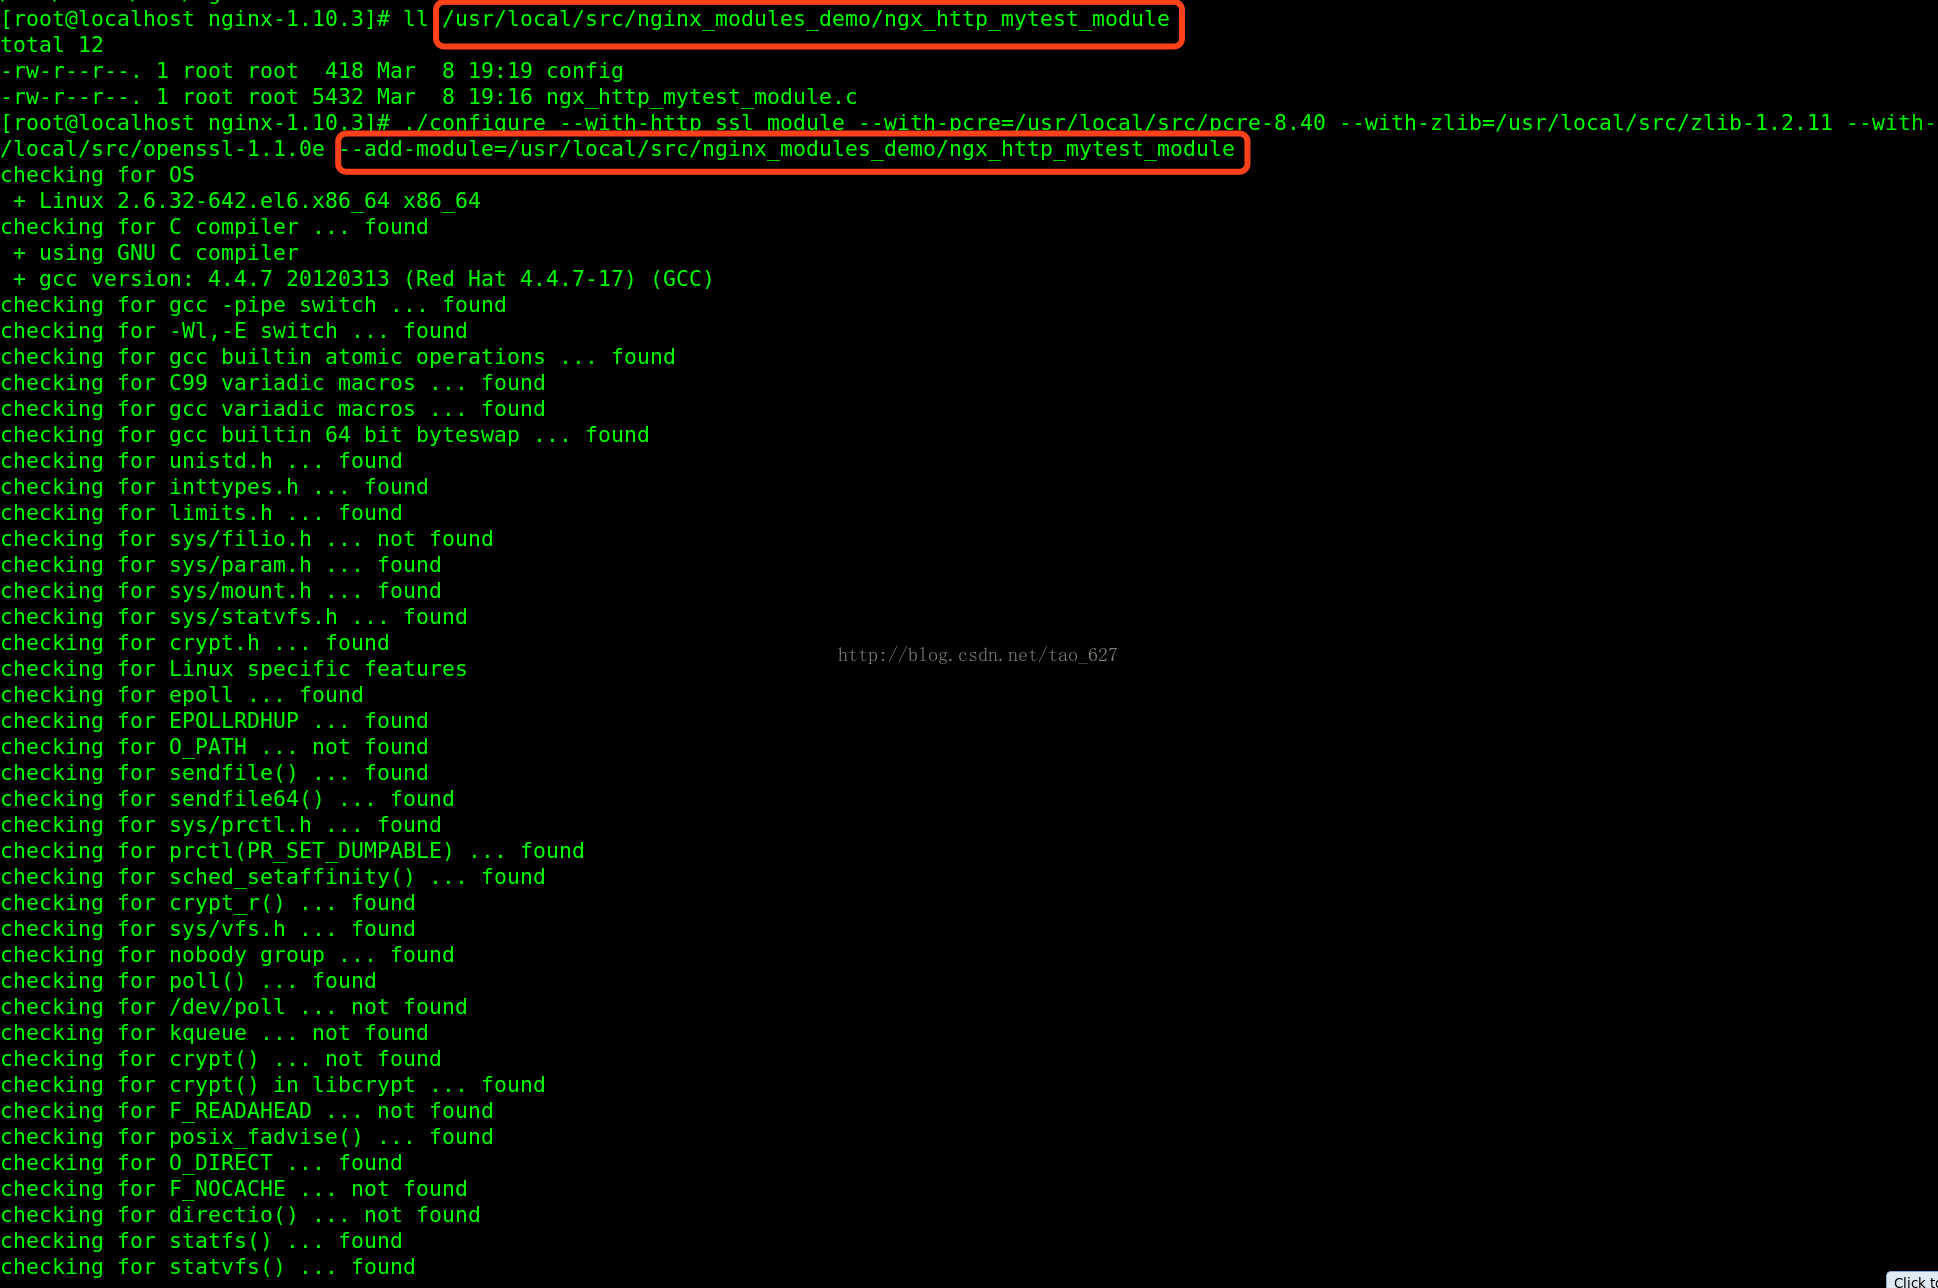
源码编译生成第三方模块
./configure --with-http_ssl_module \
--with-pcre=/usr/local/src/pcre-8.40 \
--with-zlib=/usr/local/src/zlib-1.2.11 \
--with-openssl=/usr/local/src/openssl-1.1.0e \
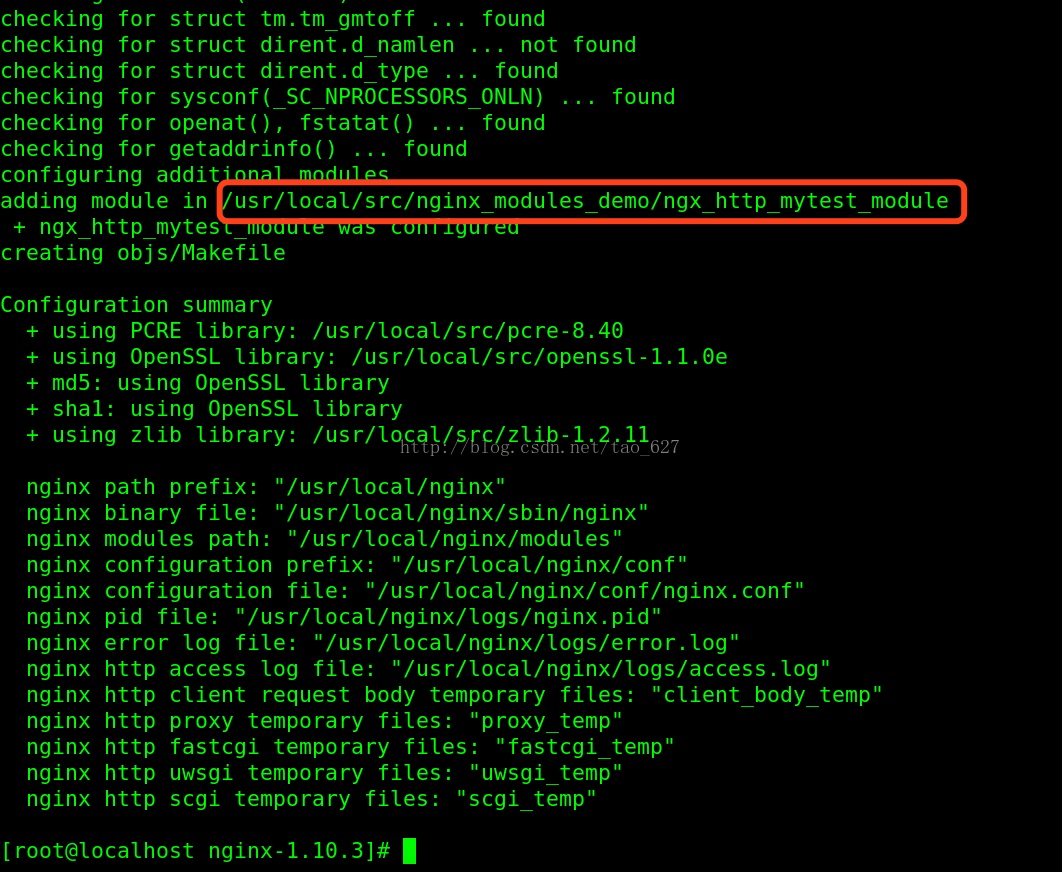
--add-module=/usr/local/src/nginx_modules_demo/ngx_http_mytest_module
注意之后直接配置第三方模块,原有已经变化

make
make install
修改nginx配置文件,添加指定location块
vim /usr/local/nginx/config/nginx.config
在nginx.config中添加
location /test{
mytest;
}
开启nginx
/usr/local/nginx/sbin/nginx

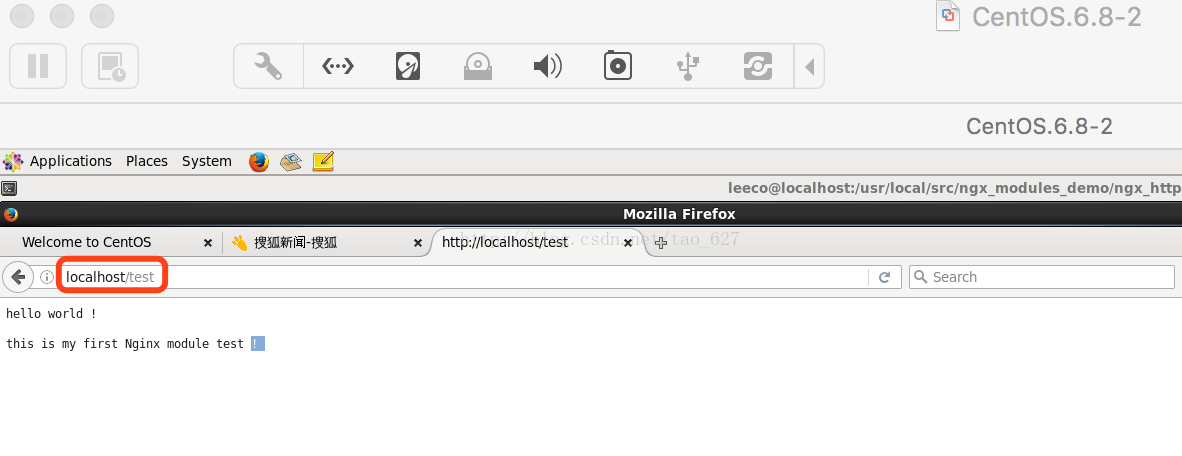
从浏览器中访问
地址栏中输入
http://localhost/test
如何看到如下结果,说明该第三方模块ngx_http_mytest_module

ngx_http_mytest_module.c文件内容:
#include <ngx_config.h>
#include <ngx_core.h>
#include <ngx_http.h>
static ngx_int_t ngx_http_mytest_handler(ngx_http_request_t *r);
static char * ngx_http_mytest(ngx_conf_t *cf, ngx_command_t *cmd, void *conf);
//定义模块配置文件的处理
static ngx_command_t ngx_http_mytest_commands[] = {
{ //配置项名称
ngx_string("mytest"),
//配置项类型,即定义他可以出现的位置
NGX_HTTP_MAIN_CONF|NGX_HTTP_SRV_CONF|NGX_HTTP_LOC_CONF|NGX_HTTP_LMT_CONF|NGX_CONF_NOARGS,
//处理配置项参数的函数,函数在下面定义
ngx_http_mytest,
//在配置文件中的偏移量
NGX_HTTP_LOC_CONF_OFFSET,
//预设的解析方法配置项
0,
//配置项读取后的处理方法
NULL
},
//command数组要以ngx_null_command结束
//#define ngx_null_command {ngx_null_string,0,NULL,0,0,NULL}
ngx_null_command
};
//mytest模块上下文,都为NULL即是说在http框架初始化时没有什么要做
static ngx_http_module_t ngx_http_mytest_module_ctx = {
NULL, //preconfiguration
NULL, //postconfiguration
NULL, //create main configuration
NULL, //init main configuration
NULL, //create server configuration
NULL, //merge server configuration
NULL, //create location configuration
NULL //merge location configuration
};
//对自己mytest模块的定义,在编译时加入到全局的ngx_modules数组中,这样在Nginx初始化时会调用模块的所有初始化方法,(上面的ngx_http_module_t类型的ngx_http_mytest_module_ctx)
ngx_module_t ngx_http_mytest_module = {
NGX_MODULE_V1, //由Nginx定义的宏来初始化前七个成员
&ngx_http_mytest_module_ctx, //模块的上下文结构体,指向特定模块的公共方法
ngx_http_mytest_commands, //处理配置项的结构体数组
NGX_HTTP_MODULE, //模块类型
//Nginx在启动停止过程中七个执行点的函数指针
NULL,
NULL,
NULL,
NULL,
NULL,
NULL,
NULL,
NGX_MODULE_V1_PADDING //由Nginx定义的宏定义剩下的8个保留字段
};
//配置项对应的回调函数,当配置项中出现mytest配置项时将调用这个函数
static char * ngx_http_mytest(ngx_conf_t *cf, ngx_command_t *cmd, void *conf)
{ //ckcf并不是指特定的location块内的数据结构,他可以是mian、srv、loc级别的配置项
//每个http{},sever{},location{}都有一个ngx_http_core_loc_conf_t类型的数据结构
ngx_http_core_loc_conf_t *clcf;
//找到mytest配置项所在的配置块
clcf = ngx_http_conf_get_module_loc_conf(cf, ngx_http_core_module);
//http框架在处理用户请求进行到NGX_HTTP_CONTENT_PHASE阶段是,如果请求的主机名,URI与配置项所在的配置块相匹配时,就调用
//clcf中的handle方法处理这个请求
//NGX_HTTP_CONTENT_PHASE用于处理http请求内容的阶段,这是大部分http模块通常介入的阶段
clcf->handler = ngx_http_mytest_handler;
return NGX_CONF_OK;
}
//实际完成处理的回调函数
static ngx_int_t ngx_http_mytest_handler(ngx_http_request_t *r)
{
//请求方法
if (!(r->method & (NGX_HTTP_GET | NGX_HTTP_HEAD))) {
return NGX_HTTP_NOT_ALLOWED;
}
//不处理请求的包体,直接丢弃。但这一步也是不可省略的,他是接受包体的一种方法,只不过是简单的丢弃,
//如果不接受,客户端可能会再次试图发送包体,而服务器不接受就会造成客户端发送超时
ngx_int_t rc = ngx_http_discard_request_body(r);
if (rc != NGX_OK) {
return rc;
}
//构造响应头部
ngx_str_t type = ngx_string("text/plain");
ngx_str_t response = ngx_string("hello world ! \n\rthis is my first Nginx module test ! ");
r->headers_out.status = NGX_HTTP_OK;
r->headers_out.content_length_n = response.len;
r->headers_out.content_type = type;
//发送http头部,其中也包括响应行
rc = ngx_http_send_header(r);
if (rc == NGX_ERROR || rc > NGX_OK || r->header_only) {
return rc;
}
ngx_buf_t *b;
//根据请求中传来的内存池对象,创建内存buf
b = ngx_create_temp_buf(r->pool, response.len);
if (b == NULL) {
return NGX_HTTP_INTERNAL_SERVER_ERROR;
}
//有效内容从pos位置开始,复制respon的内容
ngx_memcpy(b->pos, response.data, response.len);
//有效内容到last结束
b->last = b->pos + response.len;
//因为ngx_buf_t可以由ngx_chain_t链表链起来,last_buf可以标记这是最后一块待处理的缓冲区,简化处理
b->last_buf = 1;
//将内存buf用链表链起来,作为ngx_http_output_filter的跌入个参数
ngx_chain_t out;
out.buf = b;
//标记这是最后一个ngx_chain_t
out.next = NULL;
return ngx_http_output_filter(r, &out);
}
config文件的内容:
#仅在configure执行时使用,一般设置为模块名称
ngx_addon_name=ngx_http_mytest_module
#HTTP_MODULES保存所有的模块名称,在重设HTTP_MODULES时不能直接覆盖,而是先取得以前的HTTP_MODULES,在加上自己的模块
HTTP_MODULES="$HTTP_MODULES ngx_http_mytest_module"
#指定新增源代码文件
NGX_ADDON_SRCS="$NGX_ADDON_SRCS $ngx_addon_dir/ngx_http_mytest_module.c"

