KVM(基于内核的虚拟机)是标准的RHEL内核中内置的完整的虚拟化解决方案。它可以运行多款未经修改的Windows和Linux虚拟客户机操作系统。RHEL中的KVM系统管理程序通过libvirtAPI 和使用程序进行管理,如virt-manager何virsh等。以下实例中举例介绍如何利用KVM虚拟化技术安装RHEL7操作系统。
1.使用 grep 确认你 Desktop 的 CPU 支持虚拟化
[root@desktop1 ~]# grep -E "vmx|svm" /proc/cpuinfo
flags : fpu vme de pse tsc msr pae mce cx8 apic sep mtrr pge mca cmov pat pse36 clflush dts mmx fxsr sse sse2 ss syscall nx pdpe1gb rdtscp lm constant_tsc arch_perfmon pebs bts nopl xtopology tsc_reliable nonstop_tsc aperfmperf eagerfpu pni pclmulqdq vmx ssse3 fma cx16 pcid sse4_1 sse4_2 x2apic movbe popcnt tsc_deadline_timer aes xsave avx f16c rdrand hypervisor lahf_lm abm 3dnowprefetch ida arat epb xsaveopt pln pts dtherm tpr_shadow vnmi ept vpid fsgsbase tsc_adjust bmi1 avx2 smep bmi2 invpcid rdseed adx smap
2.确认剩余的内存空间,这个根据实际情况定吧,如果你要装的程序很耗内存那么内存就要多留一些了。
[root@desktop1 ~]# free -h
total used free shared buffers cached
Mem: 1.8G 887M 939M 9.9M 1.1M 254M
-/+ buffers/cache: 632M 1.2G
Swap: 2.0G 0B 2.0G
3.确认本地已经有了rhel7的光盘镜像文件
[root@desktop1 /]# ll -h /rhel7.iso
-rw-r--r--. 1 root root 3.5G Dec 5 10:39 /rhel7.iso
4.安装以下虚拟化软件包
[root@desktop1 /]# yum -y install libvirt
[root@desktop1 /]# yum -y install libvirt-python
[root@desktop1 /]# yum -y install libvirt-client
5.使用virt-manager 命令打开图形化工具创建系统
[root@desktop1 /]# virt-manager

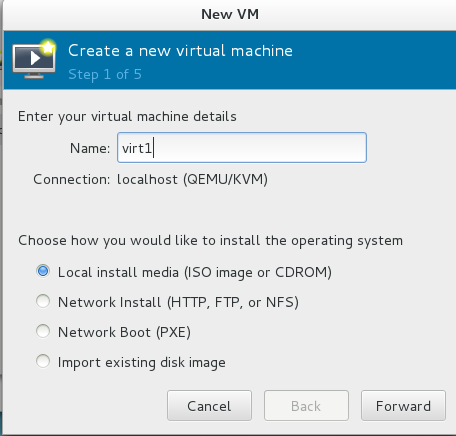
6.新建虚拟机名称为virt1,使用local install media(ISO image or CDROM)作为安装源,点击forward
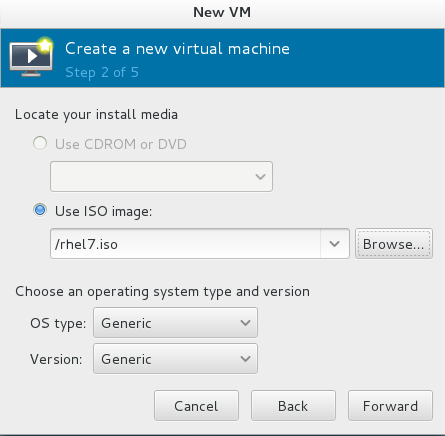
7.在image中选择准备好的ISO文件,其他保持默认点击forward
8.内存1024M,cpu核心选择1个,点击forward

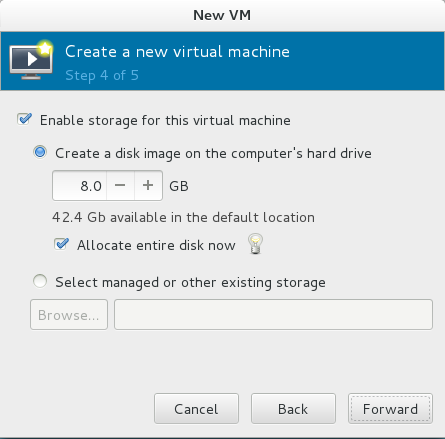
9.硬盘选择8G即可,其他保持默认,点击forward
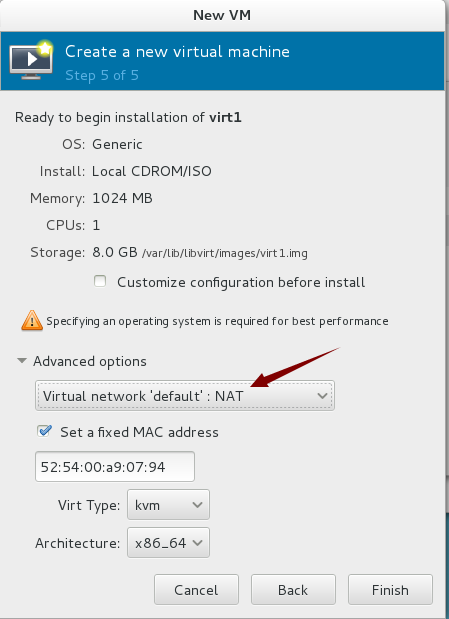
10.在高级选项卡里选择网卡类型为“NAT”,点击Finsh
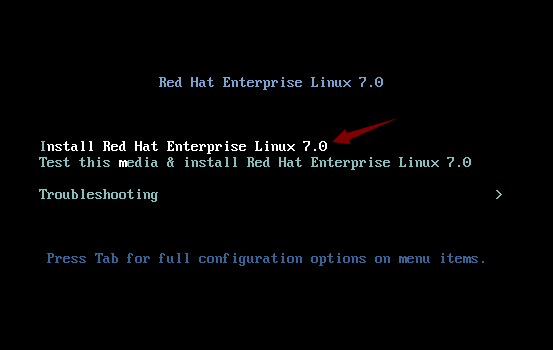
11.虚拟机第一次启动会自动读取光盘,光标移动到第一行“Install Red ...”
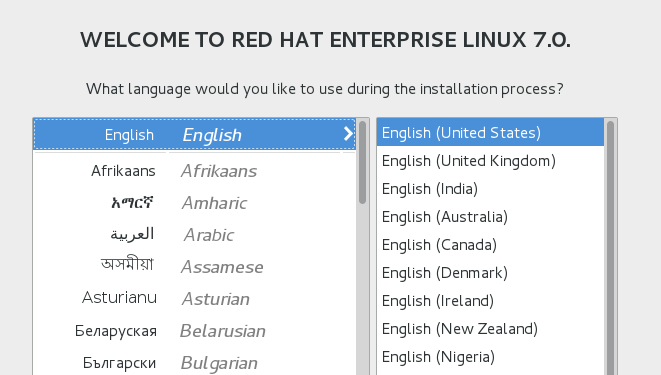
12.在安装语言中选择英语(保持默认),随机进入系统安装界面,点击“Installation Destination”,定义磁盘分配方案(其他默认即可)
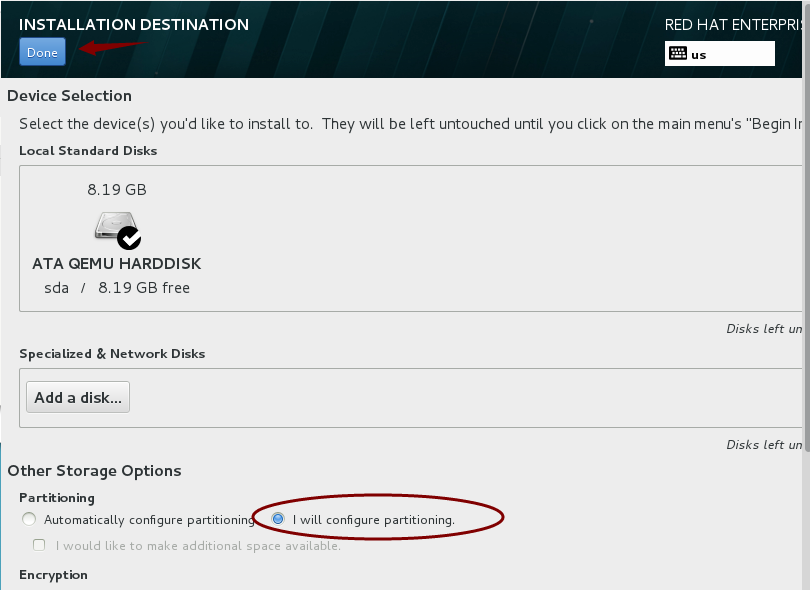
13.选中“I will configure partitioning”,自定义磁盘分区方案,然后点击“done”
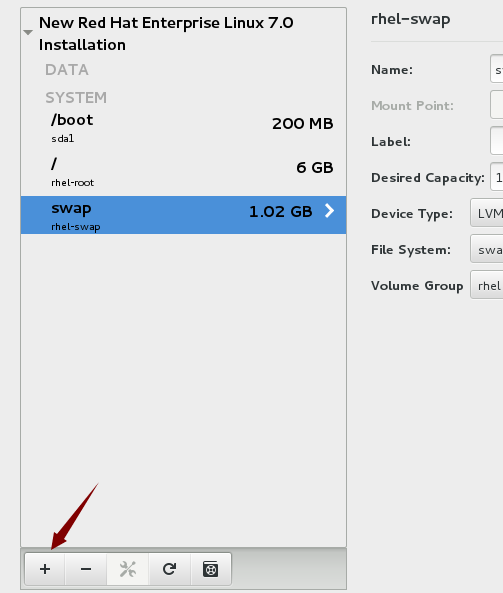
14.在磁盘分区窗口中点击“+”按钮,定义/boot分区,大小200M,随后点击“Add mount point”;定义一个根分区,大小6000M,随后点击“Add mount point”;定义swap空间,大小1024M,随后点击“Add mount point”;最终得到如下结果
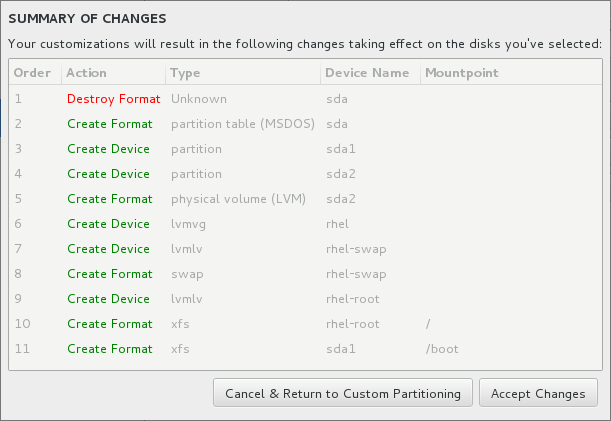
15.14步配置好后点击“done”,然后选择Accept Changes
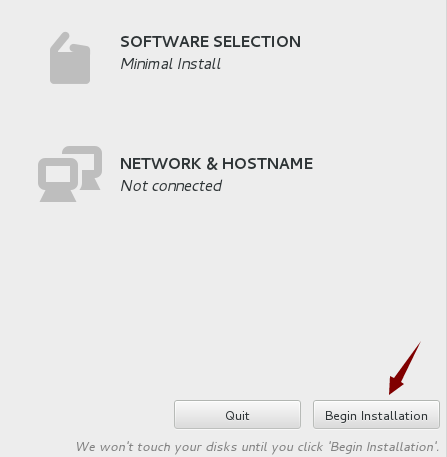
16.现在可以点击“Begin installation”,开始安装系统了
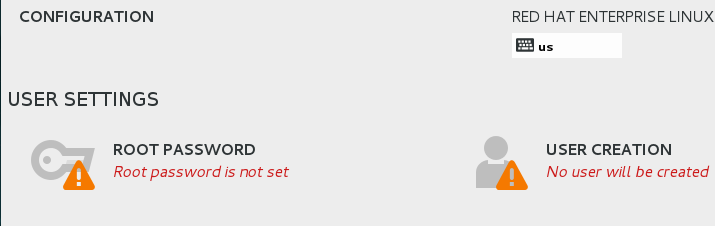
17.在系统安装过程中,需要点击“ROOT PASSWORD”,来设置root用户的密码
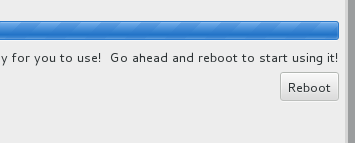
18.等待系统安装完成,点击reboot重启系统