
对于很多小白来说,直接上手应用Linux操作系统实在是一种高风险的行为。那么对于习惯了Windows界面,但更想尝试Linux系统的朋友来说,解决方案很简单:在电脑上安装Linux操作系统,然后再安装一个VirtualBox虚拟机,虚拟机中在安装Windows(10)系统。
当然你也可以直接安装双系统,但是虚拟机和双系统在安全性、硬盘分区等方面还是有很大区别的。这篇文章主要讲了如何在Linux上安装虚拟机Windows10系统的小白教程。
既然是小白教程,首先要科普一下什么是VirtualBox,什么是虚拟机。

VirtualBox是一款来自甲骨文(之前是SUN)公司的一款开源软件,我们可以在VirtualBox上安装任何系统和软件。但VirtualBox是一款虚拟机软件,意为他针对于电脑自身的操作系统而言,虚拟机中安装的所有软件和系统都不会对电脑自身的操作系统和电脑本身产生影响。
在正式安装之前先看一下您都需要准备哪些东西:
①已经下载完成的Windows 10镜像或者很好的网速。
②至少拥有4GB RAM的电脑,当然RAM越大越好。
③需要为安装Windows 10准备大约20GB的内存空间。
获得Windows 10镜像
首先,要先下载Windows 10的镜像,下载Windows 10镜像时,你可以选择32位或64位的系统,还可以选择语言。
对于乌班图(或者Linux Mint)用户,获取并安装VirtualBox十分容易,只需要输入如下命令:
sudo apt-get install virtualbox-5.0
在虚机中安装Windows 10
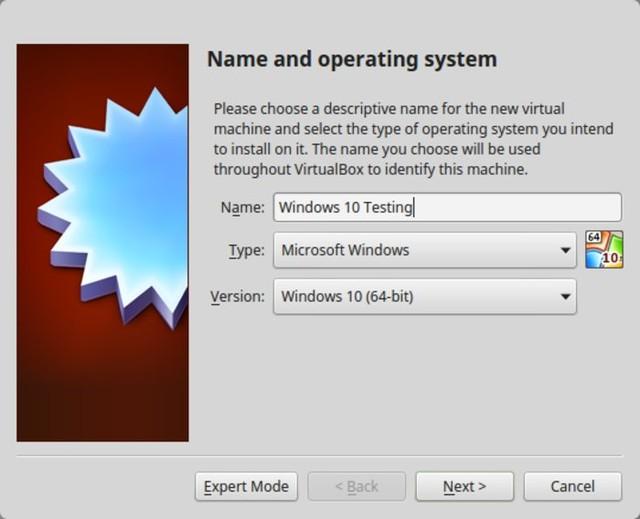
首先我们需要打开安装好的VirtualBox,然后单击“New”,选择新建。

然后输入一个有代表性的名字,再选择自己的要安装的操作系统的版本和类型,这里以64位的Windows 10操作系统为例。
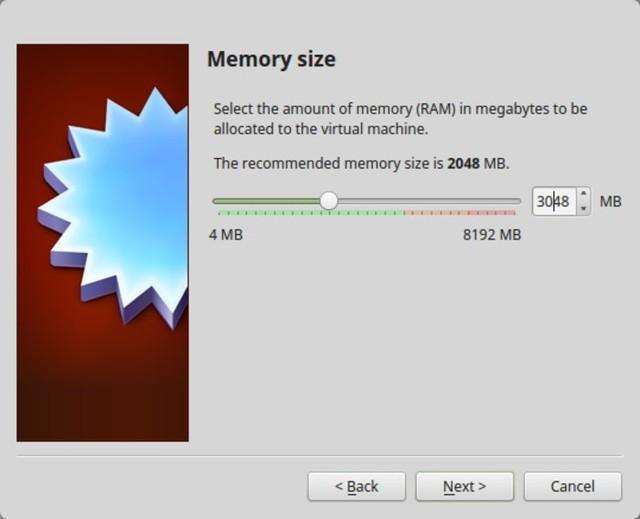
然后选择RAM的大小,针对64位的Windows 10,RAM值最小为2GB,32为Windows 10是1GB,这里建议比最小值略大。
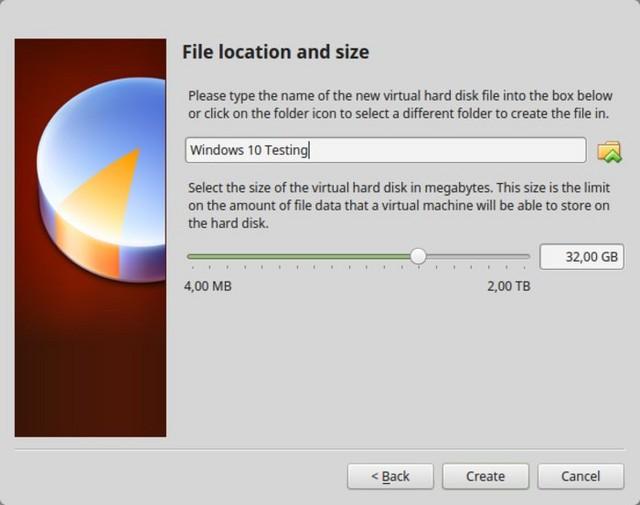
在选择续集大小时,建议选择比推荐大小略大,当然这里的前提是你有充足的空间。
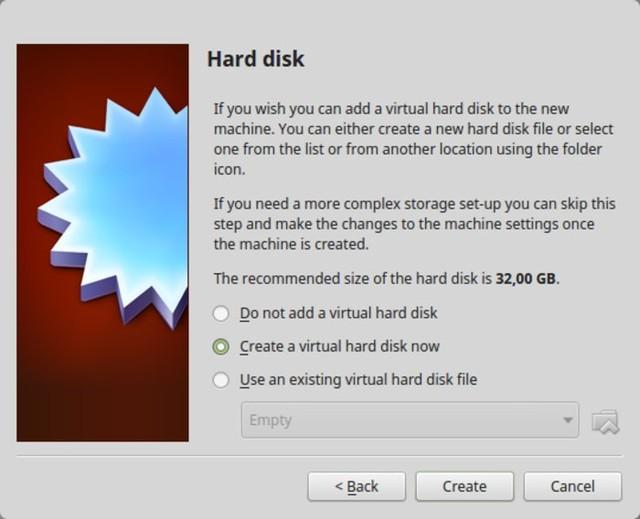
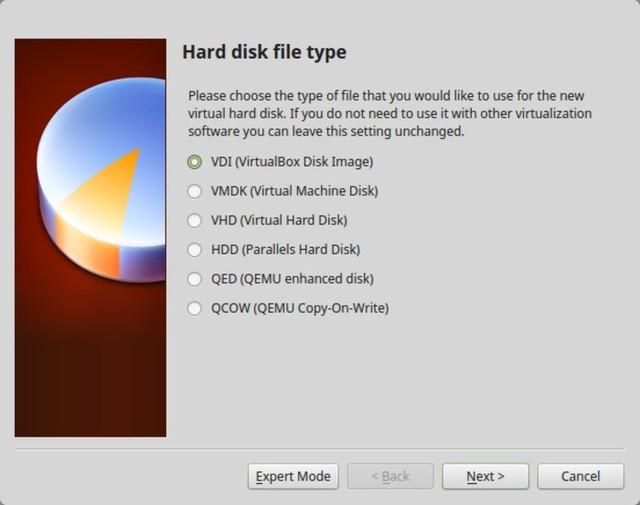
硬盘类型选择VDI
接下来应该选择动态或静态硬盘。动态的硬盘会可能会最后超出你分配的硬盘额度,如果你不经常使用虚机中的系统,建议您选择静态硬盘。

完成以上这些之后,可以创建一个虚拟磁盘。
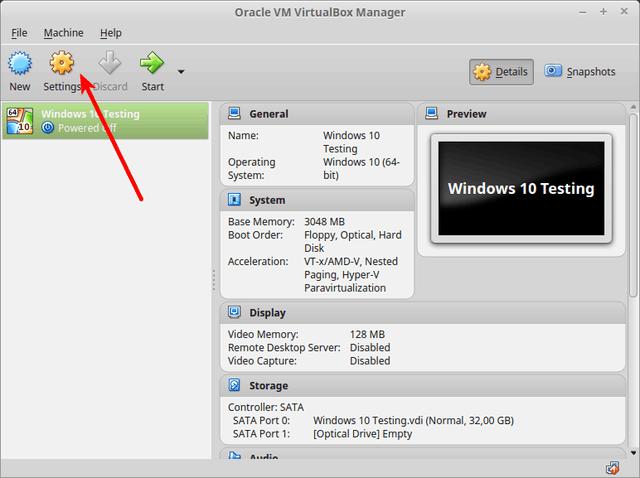
做了这么多我们还没有用到Windows 10镜像。需要先退回到虚机的开始面,单击“setting”设置。
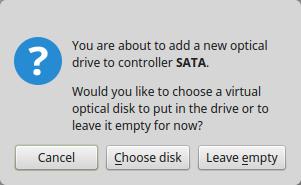
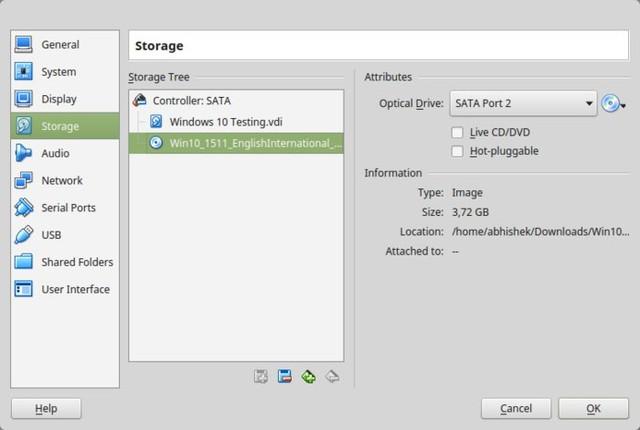
然后会提示您正在添加一个光盘驱动器,然后,点击中间的“Choose disk”选择一个磁盘。
可以看到Windows 10的镜像就在“Storage”存储列表下面。点击“Windows 10”。
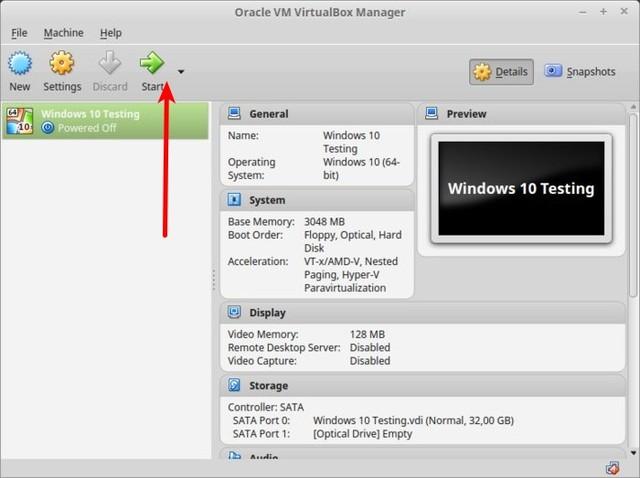
然后退回到VirtualBox首页,目前已经做好了准备工作,然后就要对Windows 10进行安装了,单击“Start”启动。
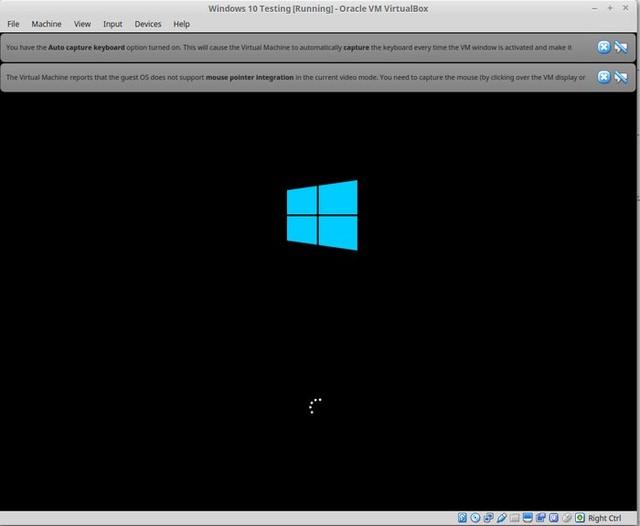
下面的界面是不是很熟悉?没错我们的Windows 10开始安装了。
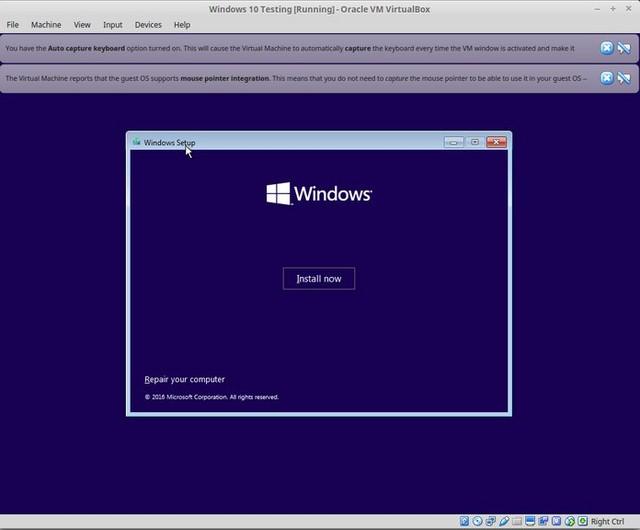
接下来会进入Windows设置(install)界面,接下来就是Windows 10的常规安装步骤。相信这些就不用一一介绍了吧。
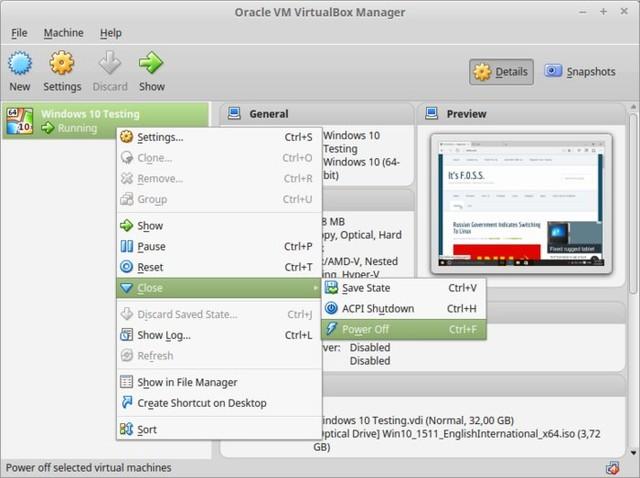
如此就成功的将Windows系统装在虚拟机之上了。当不再需要Windows系统时,亲右击Windows 10(如下图),点击“Close”关闭程序。
但在此打开VirtualBox是,只要点击绿色“Start”按钮就启动Windows系统了。在乌班图或Linux Mint上安装虚机装Windows系统,你学会了吗?