Canvas被Black Duck标榜为"唯一的一款商业开源学习管理系统,而且是唯一的一款部署在云端的学习管理系统LMS"。
Canvas的确是一款优秀的lms,界面美观/功能完备/丰富的API,尤其适合校内教学使用,有班级/小组/学期的概念。
下面是安装过程:
首先,要安装一台干净的Ubuntu14.04,只安装open ssh,建议安装成纯英文系统。
接下来可以安装官方的教程一步一步安装。
1.安装Postgres数据库,命令如下
sudo apt-get install postgresql-9.3
2.配置Postgres,命令如下
sudo -u postgres createuser canvas --no-createdb \
--no-superuser --no-createrole --pwprompt
sudo -u postgres createdb canvas_production --owner=canvas
3.安装Git软件,命令如下
sudo apt-get install git-core
4.通过GitHub获取Canvas-LMS代码并设置分支,本地放在/var下面,命令如下
git clone https://github.com/instructure/canvas-lms.git canvas
cd canvas
git branch --set-upstream-to origin/stable
5.安装Ruby2.1/2.2的apt源,命令如下
sudo apt-get install software-properties-common
sudo apt-add-repository ppa:brightbox/ruby-ng
sudo apt-get update
6.安装Ruby2.2(可自选2.1或2.2),命令如下
sudo apt-get install ruby2.2 ruby2.2-dev zlib1g-dev libxml2-dev \
libsqlite3-dev postgresql libpq-dev \
libxmlsec1-dev curl make g++
7.安装Ruby2.1(可自选2.1或2.2),命令如下
sudo apt-get install ruby2.1 ruby2.1-dev zlib1g-dev libxml2-dev \
libsqlite3-dev postgresql libpq-dev \
libxmlsec1-dev curl make g++
8.安装Node.js,命令如下
curl -sL https://deb.nodesource.com/setup_6.x | sudo -E bash -
sudo apt-get install nodejs
9.设置系统账户为Postgres的超级用户,命令如下
sudo -u postgres createuser $USER
sudo -u postgres psql -c "alter user $USER with superuser" postgres
10.使用gem安装bundler,命令如下
sudo gem install bundler --version 1.12.5
bundle install --path vendor/bundle
11.设置Canvas默认配置,命令如下
for config in amazon_s3 database \
delayed_jobs domain file_store outgoing_mail security external_migration; \
do cp config/$config.yml.example config/$config.yml; done
12.配置数据库文件,修改为自己设置的数据库密码,命令如下
cp config/database.yml.example config/database.yml
nano config/database.yml
13.配置SMTP邮件服务器,命令如下
cp config/outgoing_mail.yml.example config/outgoing_mail.yml
ano config/outgoing_mail.yml
14.配置域名,命令如下
cp config/domain.yml.example config/domain.yml
nano config/domain.yml
15.配置安全字符串文件,安全字符串不能少于20个字符,命令如下
cp config/security.yml.example config/security.yml
nano config/security.yml
16.初始化数据库,命令如下
cd /var/canvas
RAILS_ENV=production bundle exec rake db:initial_setup
17.添加Canvas用户,命令如下
sudo adduser --disabled-password --gecos canvas canvasuser
18.配置缓存文件,命令如下
cd /var/canvas
mkdir -p log tmp/pids public/assets public/stylesheets/compiled
touch Gemfile.lock
sudo chown -R canvasuser config/environment.rb log tmp public/assets \
public/stylesheets/compiled Gemfile.lock config.ru
19.接着安装npm并运行生成缓存文件,命令如下
npm install
RAILS_ENV=production bundle exec rake canvas:compile_assets
20.修改配置文件权限,命令如下
sudo chown canvasuser config/*.yml
sudo chmod 400 config/*.yml
21.配置Passenger 的apt源,命令如下
sudo apt-key adv --keyserver hkp://keyserver.ubuntu.com:80 --recv-keys 561F9B9CAC40B2F7
sudo apt-get install -y apt-transport-https ca-certificates
sudo sh -c 'echo deb https://oss-binaries.phusionpassenger.com/apt/passenger trusty main > /etc/apt/sources.list.d/passenger.list'
sudo apt-get update
22.安装Passenger 及Apache,命令如下
sudo apt-get install passenger libapache2-mod-passenger apache2
23.启用mod_rewrite模块,命令如下
sudo a2enmod rewrite
24.启用Apache的SSL服务,命令如下
sudo a2enmod ssl
25.删除Apache默认站点,命令如下
sudo unlink /etc/apache2/sites-enabled/000-default.conf
26.创建新的站点配置文件并写入一下信息,命令如下
sudo nano /etc/apache2/sites-available/canvas.conf
内容:可以对应修改一下域名等信息
<VirtualHost *:80>
ServerName canvas.example.com
ServerAlias files.canvas.example.com
ServerAdmin youremail@example.com
DocumentRoot /var/canvas/public
RewriteEngine On
RewriteCond %{HTTP:X-Forwarded-Proto} !=https
RewriteCond %{REQUEST_URI} !^/health_check
RewriteRule (.*) https://%{HTTP_HOST}%{REQUEST_URI} [L]
ErrorLog /var/log/apache2/canvas_errors.log
LogLevel warn
CustomLog /var/log/apache2/canvas_access.log combined
SetEnv RAILS_ENV production
<Directory /var/canvas/public>
Options All
AllowOverride All
Require all granted
</Directory>
</VirtualHost>
<VirtualHost *:443>
ServerName canvas.example.com
ServerAlias files.canvas.example.com
ServerAdmin youremail@example.com
DocumentRoot /var/canvas/public
ErrorLog /var/log/apache2/canvas_errors.log
LogLevel warn
CustomLog /var/log/apache2/canvas_ssl_access.log combined
SSLEngine on
BrowserMatch "MSIE [2-6]" nokeepalive ssl-unclean-shutdown downgrade-1.0 force-response-1.0
BrowserMatch "MSIE [17-9]" ssl-unclean-shutdown
# the following ssl certificate files are generated for you from the ssl-cert package.
SSLCertificateFile /etc/ssl/certs/ssl-cert-snakeoil.pem
SSLCertificateKeyFile /etc/ssl/private/ssl-cert-snakeoil.key
SetEnv RAILS_ENV production
<Directory /var/canvas/public>
Options All
AllowOverride All
Require all granted
</Directory>
</VirtualHost>
27.启用canvas站点,命令如下
sudo a2ensite canvas
28.安装redis服务器的apt源及软件,命令如下
sudo add-apt-repository ppa:chris-lea/redis-server
sudo apt-get update
sudo apt-get install redis-server
29.配置站点缓存文件,命令如下
cd /var/canvas/
cp config/cache_store.yml.example config/cache_store.yml
nano config/cache_store.yml
sudo chown canvasuser config/cache_store.yml
sudo chmod 400 config/cache_store.yml
配置内容如下
test:
cache_store: redis_store
development:
cache_store: redis_store
production:
cache_store: redis_store
30.配置redis文件,命令如下
cd /var/canvas/
cp config/redis.yml.example config/redis.yml
nano config/redis.yml
sudo chown canvasuser config/redis.yml
sudo chmod 400 config/redis.yml
配置内容如下:
production:
servers:
- redis://localhost
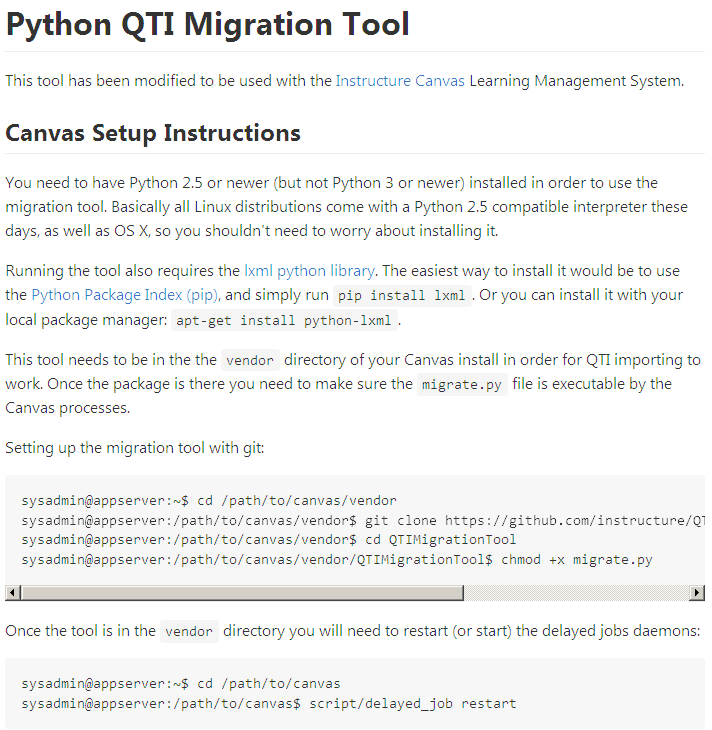
31.安装QTIMigrationTool,参照:
https://github.com/instructure/QTIMigrationTool/wiki

32.设置canvas服务自动启动并重启Apache,命令如下
sudo ln -s /var/canvas/script/canvas_init /etc/init.d/canvas_init
sudo update-rc.d canvas_init defaults
sudo /etc/init.d/canvas_init start
sudo /etc/init.d/apache2 restart
到这里就可以访问设置的域名或者直接访问IP,如果看到登陆界面,恭喜您完成了Canvas安装了!

