oVirt(http://www.ovirt.org/)是基于 KVM 项目的开源软件,其前身是 Redhat 的桌面虚拟化商业产品。
oVirt相关项目源代码:https://github.com/oVirt
oVirt主要由两部分组成:
oVirt Engine:基于Web的图形管理接口
oVirt Node:类似KVM,用来创建运行虚拟机
CentOS 7安装配置oVirt
基本系统环境:
oVirt Engine:192.168.0.10 (hostname:ovirtengine.topspeedsnail.com)
oVirt Node:192.168.0.20 (hostname:ovirtnode.topspeedsnail.com)
如果你没有使用DNS解析域名,在/etc/hosts文件中添加:
192.168.0.10 ovirtengine.topspeedsnail.com
192.168.0.20 ovirtnode.topspeedsnail.com
安装oVirt Engine
oVirt目前最新版本是4.0,添加oVirt4.0仓库:
yum update
yum install http://resources.ovirt.org/pub/yum-repo/ovirt-release40.rpm
安装ovirt-engine:
yum install ovirt-engine
运行初始化脚本,设置oVirt Engine:
engine-setup --generate-answer=/root/answer.txt
你需要回答一系列问题,答案会记录到answer.txt文件,下次你可以直接使用这个文件自动回答。

[ INFO ] Stage: Initializing
[ INFO ] Stage: Environment setup
Configuration files: ['/etc/ovirt-engine-setup.conf.d/10-packaging-jboss.conf', '/etc/ovirt-engine-setup.conf.d/10-packaging.conf']
Log file: /var/log/ovirt-engine/setup/ovirt-engine-setup-20160827090938-ruls1l.log
Version: otopi-1.5.2 (otopi-1.5.2-1.el7.centos)
[ INFO ] Stage: Environment packages setup
[ INFO ] Yum Downloading: base/7/x86_64 (0%)
[ INFO ] Yum Downloading: ovirt-4.0-epel/x86_64/primary_db 404 k(9%)
[ INFO ] Yum Downloading: ovirt-4.0-epel/x86_64/primary_db 1.6 M(37%)
[ INFO ] Yum Downloading: ovirt-4.0-epel/x86_64/primary_db 2.8 M(66%)
[ INFO ] Yum Downloading: ovirt-4.0-epel/x86_64/primary_db 3.8 M(90%)
[ INFO ] Stage: Programs detection
[ INFO ] Stage: Environment setup
[ INFO ] Stage: Environment customization
--== PRODUCT OPTIONS ==--
Configure Engine on this host (Yes, No) [Yes]: Yes
Configure Image I/O Proxy on this host? (Yes, No) [Yes]: Yes
Configure WebSocket Proxy on this host (Yes, No) [Yes]: Yes
Please note: Data Warehouse is required for the engine. If you choose to not configure it on this host, you have to configure it on a remote host, and then configure the engine on this host so that it can access the database of the remote Data Warehouse host.
Configure Data Warehouse on this host (Yes, No) [Yes]: Yes
Configure VM Console Proxy on this host (Yes, No) [Yes]: Yes
--== PACKAGES ==--
[ INFO ] Checking for product updates...
[ INFO ] No product updates found
--== NETWORK CONFIGURATION ==--
Host fully qualified DNS name of this server [ovirtengine.topspeedsnail.com]: ovirtengine.topspeedsnail.com
--== DATABASE CONFIGURATION ==--
Where is the DWH database located? (Local, Remote) [Local]: Local
Setup can configure the local postgresql server automatically for the DWH to run. This may conflict with existing applications.
Would you like Setup to automatically configure postgresql and create DWH database, or prefer to perform that manually? (Automatic, Manual) [Automatic]: Automatic
Where is the Engine database located? (Local, Remote) [Local]: Local
Setup can configure the local postgresql server automatically for the engine to run. This may conflict with existing applications.
Would you like Setup to automatically configure postgresql and create Engine database, or prefer to perform that manually? (Automatic, Manual) [Automatic]: Automatic
--== OVIRT ENGINE CONFIGURATION ==--
Engine admin password:
Confirm engine admin password:
[WARNING] Password is weak: it is too simplistic/systematic
Use weak password? (Yes, No) [No]: Yes
Application mode (Virt, Gluster, Both) [Both]: Both
--== STORAGE CONFIGURATION ==--
Default SAN wipe after delete (Yes, No) [No]: No
--== PKI CONFIGURATION ==--
Organization name for certificate [topspeedsnail.com]: MyTest
--== APACHE CONFIGURATION ==--
Setup can configure the default page of the web server to present the application home page. This may conflict with existing applications.
Do you wish to set the application as the default page of the web server? (Yes, No) [Yes]: Yes
Setup can configure apache to use SSL using a certificate issued from the internal CA.
Do you wish Setup to configure that, or prefer to perform that manually? (Automatic, Manual) [Automatic]: Automatic
--== SYSTEM CONFIGURATION ==--
Configure an NFS share on this server to be used as an ISO Domain? (Yes, No) [No]: No
--== MISC CONFIGURATION ==--
Please choose Data Warehouse sampling scale:
(1) Basic
(2) Full
(1, 2)[1]: 1
--== END OF CONFIGURATION ==--
[ INFO ] Stage: Setup validation
[WARNING] Warning: Not enough memory is available on the host. Minimum requirement is 4096MB, and 26384MB is recommended. # 内存推荐4G+
Do you want Setup to continue, with amount of memory less than recommended? (Yes, No) [No]: Yes
--== CONFIGURATION PREVIEW ==--
Application mode : both
Default SAN wipe after delete : False
Update Firewall : False
Host FQDN : ovirtengine.topspeedsnail.com
Engine database secured connection : False
Engine database host : localhost
Engine database user name : engine
Engine database name : engine
Engine database port : 5432
Engine database host name validation : False
DWH database secured connection : False
DWH database host : localhost
DWH database user name : ovirt_engine_history
DWH database name : ovirt_engine_history
DWH database port : 5432
DWH database host name validation : False
Engine installation : True
PKI organization : MyTest
Configure local Engine database : True
Set application as default page : True
Configure Apache SSL : True
DWH installation : True
Configure local DWH database : True
Engine Host FQDN : ovirtengine.topspeedsnail.com
Configure Image I/O Proxy : True
Configure VMConsole Proxy : True
Configure WebSocket Proxy : True
Please confirm installation settings (OK, Cancel) [OK]: OK
[ INFO ] Stage: Transaction setup
[ INFO ] Stopping engine service
[ INFO ] Stopping ovirt-fence-kdump-listener service
[ INFO ] Stopping dwh service
[ INFO ] Stopping Image I/O Proxy service
[ INFO ] Stopping websocket-proxy service
[ INFO ] Stage: Misc configuration
[ INFO ] Stage: Package installation
[ INFO ] Stage: Misc configuration
[ INFO ] Upgrading CA
[ INFO ] Initializing PostgreSQL
[ INFO ] Creating PostgreSQL 'engine' database
[ INFO ] Configuring PostgreSQL
[ INFO ] Creating PostgreSQL 'ovirt_engine_history' database
[ INFO ] Configuring PostgreSQL
[ INFO ] Creating CA
[ INFO ] Creating/refreshing Engine database schema
[ INFO ] Creating/refreshing DWH database schema
[ INFO ] Configuring Image I/O Proxy
[ INFO ] Setting up ovirt-vmconsole proxy helper PKI artifacts
[ INFO ] Setting up ovirt-vmconsole SSH PKI artifacts
[ INFO ] Configuring WebSocket Proxy
[ INFO ] Creating/refreshing Engine 'internal' domain database schema
[ INFO ] Generating post install configuration file '/etc/ovirt-engine-setup.conf.d/20-setup-ovirt-post.conf'
[ INFO ] Stage: Transaction commit
[ INFO ] Stage: Closing up
[ INFO ] Starting engine service
[ INFO ] Starting dwh service
[ INFO ] Restarting ovirt-vmconsole proxy service
--== SUMMARY ==--
[ INFO ] Restarting httpd
# 如果开启了防火墙,执行如下命令添加规则
In order to configure firewalld, copy the files from
/etc/ovirt-engine/firewalld to /etc/firewalld/services
and execute the following commands:
firewall-cmd --permanent --add-service ovirt-postgres
firewall-cmd --permanent --add-service ovirt-https
firewall-cmd --permanent --add-service ovirt-fence-kdump-listener
firewall-cmd --permanent --add-service ovirt-imageio-proxy
firewall-cmd --permanent --add-service ovirt-websocket-proxy
firewall-cmd --permanent --add-service ovirt-http
firewall-cmd --permanent --add-service ovirt-vmconsole-proxy
firewall-cmd --reload
The following network ports should be opened:
tcp:2222
tcp:443
tcp:5432
tcp:54323
tcp:6100
tcp:80
udp:7410
An example of the required configuration for iptables can be found at:
/etc/ovirt-engine/iptables.example
Please use the user 'admin@internal' and password specified in order to login
Web access is enabled at:
http://ovirtengine.topspeedsnail.com:80/ovirt-engine
https://ovirtengine.topspeedsnail.com:443/ovirt-engine
Internal CA 21:28:E7:25:E0:C4:A7:B6:BD:B5:12:3C:F0:21:AA:EC:5C:6A:69:9D
SSH fingerprint: 0e:df:b7:1d:ec:33:99:c2:ea:4b:25:46:22:75:2d:42
--== END OF SUMMARY ==--
[ INFO ] Stage: Clean up
Log file is located at /var/log/ovirt-engine/setup/ovirt-engine-setup-20160827090938-ruls1l.log
[ INFO ] Generating answer file '/var/lib/ovirt-engine/setup/answers/20160827092010-setup.conf'
[ INFO ] Generating answer file '/root/answer.txt'
[ INFO ] Stage: Pre-termination
[ INFO ] Stage: Termination
[ INFO ] Execution of setup completed successfully
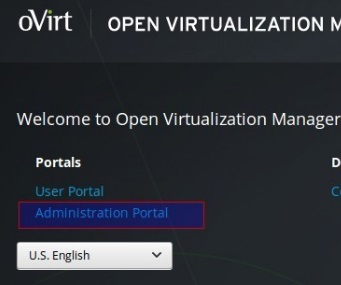
使用浏览器访问(替换你使用的域名或IP):
http://ovirtengine.topspeedsnail.com:80/ovirt-engine
https://ovirtengine.topspeedsnail.com:443/ovirt-engine
https://your_server_IP
使用管理员用户登录:

使用前面设置的admin账户登录:

安装oVirt Node
安装oVirt Node有两种方法。第一种:下载安装oVirt Node系统镜像;第二种:在已有的CentOS系统上安装vdsm。
第一种方法
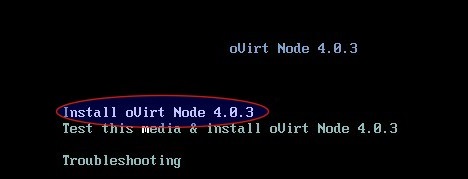
下载oVirt Node ISO文件:http://www.ovirt.org/node/

把下载的ISO系统镜像做成启动安装盘(DVD或USB)
在服务器上安装系统:

这个系统是基于CentOS的,安装步骤和安装CentOS一样。
安装完oVirt Node,设置好环境之后,把oVirt Node添加到到oVirt Engine。
登录进oVirt Engine的管理员界面->Hosts标签->New
Host Cluster:Default
Name:ovirtnode.topspeedsnail.com
Address:192.168.0.20
SSH Port:22
User Name:root
Password:<root用户密码>
现在你就可以使用oVirt Engine创建管理虚拟机了。
参考文档:
http://www.ovirt.org/documentation/
https://www.ovirt.org/develop/

