SoftEther(https://www.softether.org/)是日本筑波大学开发的VPN,它实现了众多VPN协议(SSTP,L2TP over IPsec,Openvpn等)。
SoftEther源代码托管在Github:https://github.com/SoftEtherVPN/SoftEtherVPN/
1、安装依赖包
yum update
yum groupinstall "Development Tools"
yum install zlib-devel openssl-devel readline-devel ncurses-devel wget tar dnsmasq net-tools iptables-services system-config-firewall-tui vim
2、关闭SElinux
如果你开启了SElinux,执行下面命令禁用SELinux:
sed -i 's/SELINUX=enforcing/SELINUX=disabled/g' /etc/selinux/config
重启系统,使升级的内核和SELinux生效。
3、暂时停用防火墙
# iptables
service iptables save
service iptables stop
chkconfig iptables off
# 如果使用了firewall,执行
systemctl disable firewalld
systemctl stop firewalld
4、安装SoftEther
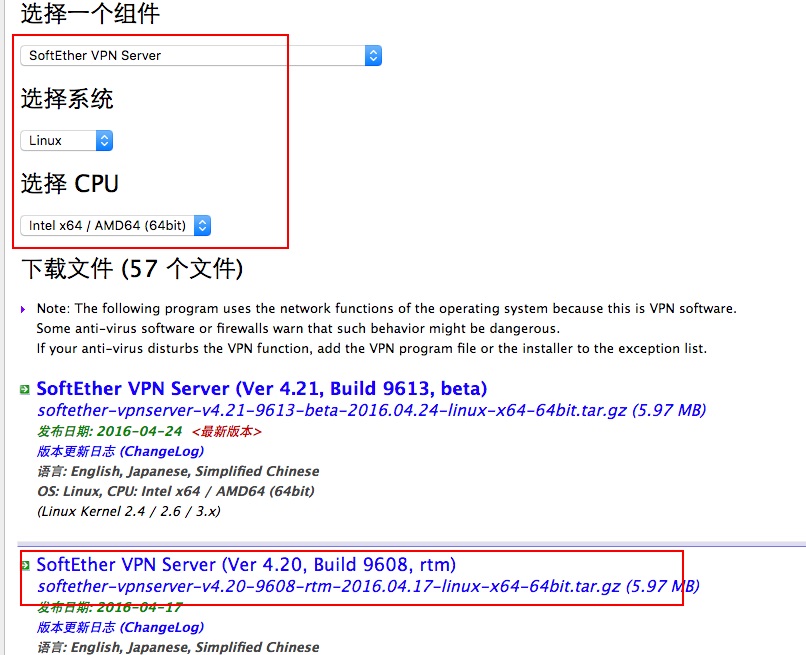
下载最新SoftEther源码:http://www.softether-download.com/cn.aspx
根据系统和CPU架构选择:

wget http://www.softether-download.com/files/softether/v4.20-9608-rtm-2016.04.17-tree/Linux/SoftEther_VPN_Server/64bit_-_Intel_x64_or_AMD64/softether-vpnserver-v4.20-9608-rtm-2016.04.17-linux-x64-64bit.tar.gz # 国内墙
解压:
tar xzvf softether-vpnserver-v4.20-9608-rtm-2016.04.17-linux-x64-64bit.tar.gz -C /opt
执行make:
cd /opt/vpnserver/
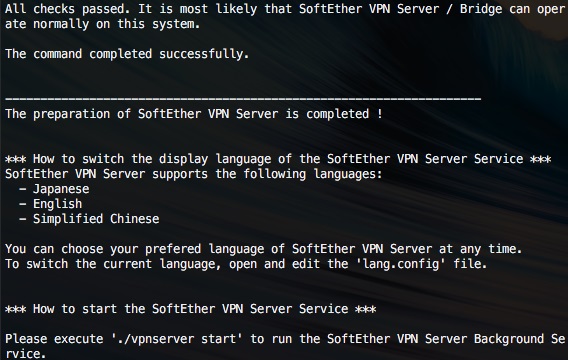
make
回答3个问题,全部选择1,同意协议。

5、配置SoftEther
启动vpnserver:
/opt/vpnserver/vpnserver start
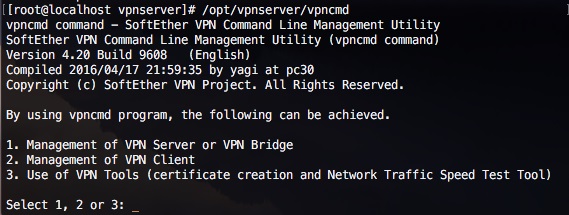
运行vpncmd:
/opt/vpnserver/vpncmd

选择1;
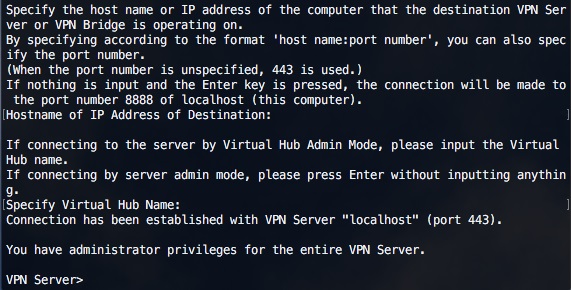
然后,两次回车:

设置VPN管理员密码:
VPN Server>ServerPasswordSet # 输入密码
创建Virtual Hub:
VPN Server>HubCreate MOB# 设置密码
下面我创建local bridge,它比SecureNAT要高效,但是配置要复杂一点。local bridge还需要DHCP服务,我会在后面安装。
VPN Server>BridgeCreate /DEVICE:"soft" /TAP:yes MOB
切换到MOB:
VPN Server>Hub MOB
创建用户:
VPN Server/MOB>UserCreate test# 全部回车即可
为用户设置密码:
VPN Server/MOB>UserPasswordSet test
设置L2TP/IPSec:
VPN Server/MOB>IPsecEnable
IPsecEnable command - Enable or Disable IPsec VPN Server Function
Enable L2TP over IPsec Server Function (yes / no): yes
Enable Raw L2TP Server Function (yes / no): yes
Enable EtherIP / L2TPv3 over IPsec Server Function (yes / no): yes
Pre Shared Key for IPsec (Recommended: 9 letters at maximum): your_shared_key
Default Virtual HUB in a case of omitting the HUB on the Username: MOB
The command completed successfully.
上面设置了IPsec协议。如果要设置OpenVPN,执行:
VPN Server/MOB>ServerCertRegenerate <your_server_IP OR domain>
VPN Server/MOB>ServerCertGet ~/cert.cer
VPN Server/MOB>SstpEnable yes
VPN Server/MOB>OpenVpnEnable yes /PORTS:1194
为OpenVPN客户端生成配置文件:
VPN Server/MOB>OpenVpnMakeConfig ~/openvpn_config.zip
回到管理员提示符:
VPN Server/MOB>Hub
Hub command - Select Virtual Hub to Manage
The Virtual Hub selection has been unselected.
The command completed successfully.
VPN Server>
开启VPN over ICMP和DNS:
VPN Server>VpnOverIcmpDnsEnable /ICMP:yes /DNS:yes
最后,Ctrl+c退出vpn命令提示符。
停止vpnserver:
/opt/vpnserver/vpnserver stop
6、设置DHCP、IP重定向
Softether已经配置完成,前面提到过,local bridge需要DHCP服务。dnsmasq在第一步已经安装,我们只需要配置一下:
vim /etc/dnsmasq.conf
在文件尾写入:
interface=tap_soft
dhcp-range=tap_soft,192.168.7.50,192.168.7.90,12h
dhcp-option=tap_soft,3,192.168.7.1
port=0
dhcp-option=option:dns-server,8.8.8.8
开启ip_forward:
echo net.ipv4.ip_forward = 1 >> /etc/sysctl.d/ipv4_forwarding.conf
sysctl -n -e --system
查看设置是否成功:
cat /proc/sys/net/ipv4/ip_forward
应该输出为1;如果为0,执行:
echo 1 > /proc/sys/net/ipv4/ip_forward
配置防火墙:
iptables -t nat -A POSTROUTING -s 192.168.7.0/24 -j SNAT --to-source [YOUR_ERVER_IP]
iptables-save > /etc/sysconfig/iptables
启动DHCP和防火墙:
systemctl start dnsmasq
systemctl enable dnsmasq
service iptables start
7、把SoftEther配置为服务
把SoftEtherVPN配置为服务进程,方便管理。
创建脚本:
vim /etc/init.d/vpnserver
写入内容:
#!/bin/sh
### BEGIN INIT INFO
# Provides: vpnserver
# Required-Start: $remote_fs $syslog
# Required-Stop: $remote_fs $syslog
# Default-Start: 2 3 4 5
# Default-Stop: 0 1 6
# Short-Description: Start daemon at boot time
# Description: Enable Softether by daemon.
### END INIT INFO
DAEMON=/opt/vpnserver/vpnserver
LOCK=/var/lock/subsys/vpnserver
TAP_ADDR=192.168.7.1
test -x $DAEMON || exit 0
case "$1" in
start)
$DAEMON start
touch $LOCK
sleep 1
/sbin/ifconfig tap_soft $TAP_ADDR
;;
stop)
$DAEMON stop
rm $LOCK
;;
restart)
$DAEMON stop
sleep 3
$DAEMON start
sleep 1
/sbin/ifconfig tap_soft $TAP_ADDR
;;
*)
echo "Usage: $0 {start|stop|restart}"
exit 1
esac
exit 0
启动vpnserver:
chmod +x /etc/init.d/vpnserver
/etc/init.d/vpnserver start
systemctl enable vpnserver

SoftEther官方文档:https://www.softether.org/4-docs

