YetiForce CRM是使用PHP编写的CRM客户关系管理系统,基于Vtiger CRM。源代码:https://github.com/YetiForceCompany/YetiForceCRM。
官网介绍:
We design an innovative CRM system that is dedicated for large and medium sized companies. We dedicate it to everyone who values open source software, security and innovation. YetiForce was built on a rock-solid Vtiger foundation, but has hundreds of changes that help to accomplish even the most challenging tasks in the simplest way. Every function within the system was thought through and automated to ensure that all of them work together seamlessly and form a coherent integrity. We looked at the entire sales process and consequently refined the system, module by module. We have years of experience creating tailor made CRM software for a variety of different companies. Download it and have a first-hand experience.
YetiForce CRM目前还不支持中文语言。要汉化也非常简单,参考源代码languages目录。
Ubuntu 16.04 安装 YetiForce CRM
1、安装LAMP
需要安装的PHP模块:
$ sudo apt-get install php7.0-mysql php7.0-curl php7.0-json php7.0-cgi php7.0 libapache2-mod-php7.0 php7.0-mcrypt php7.0-gd php7.0-zip php7.0-xml php7.0-ldap php7.0-imap
2、下载YetiForce CRM
下载地址:https://github.com/YetiForceCompany/YetiForceCRM/releases
$ wget https://github.com/YetiForceCompany/YetiForceCRM/archive/3.1.0.zip
解压到www目录:
$ sudo unzip 3.1.0.zip -d /var/www/html/
$ sudo mv /var/www/html/YetiForceCRM-3.1.0 /var/www/html/yetiforce
设置目录权限:
$ sudo chown -R www-data:www-data /var/www/html/yetiforce/
3、为YetiForce创建一个数据库
$ sudo mysql -u root -p
MariaDB [(none)]> CREATE DATABASE yetiforce;
MariaDB [(none)]> GRANT ALL PRIVILEGES ON yetiforce.* TO 'yetiforce'@'localhost' IDENTIFIED BY 'test1234';
MariaDB [(none)]> FLUSH PRIVILEGES;
MariaDB [(none)]> \q
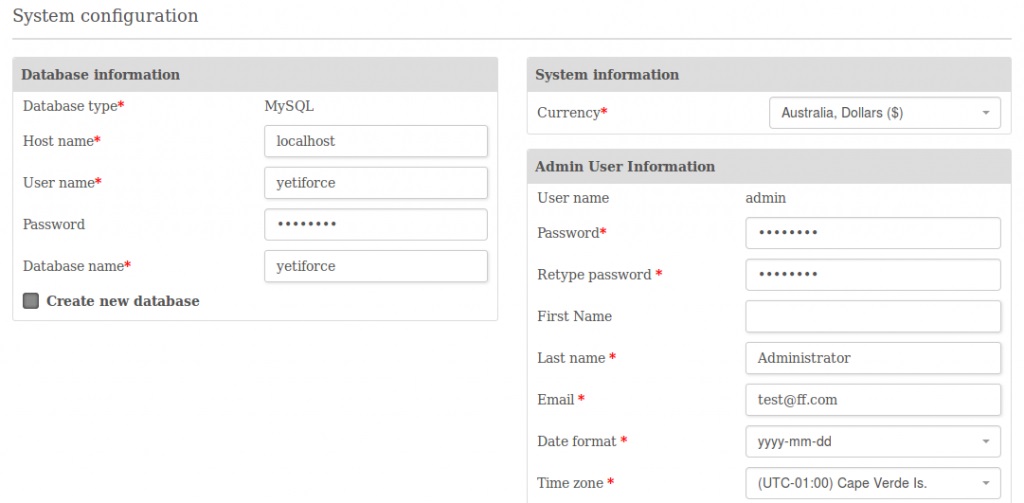
上面命令创建了一个yetiforce数据库和yetiforce用户(密码test1234)。
4、配置Apache
开启rewrite模块:
$ sudo a2enmod rewrite
创建配置文件:
$ sudo vim /etc/apache2/sites-available/yetiforce.conf
<VirtualHost *:80>
ServerAdmin admin@yourdomain.com
DocumentRoot /var/www/html/yetiforce/
ServerName your-domain.com
ServerAlias www.your-domain.com
<Directory /var/www/html/yetiforce/>
Options FollowSymLinks
AllowOverride All
Order allow,deny
allow from all
</Directory>
ErrorLog /var/log/apache2/your-domain.com-error_log
CustomLog /var/log/apache2/your-domain.com-access_log common
</VirtualHost>
注意替换上面的域名。
使配置生效:
$ sudo ln -s /etc/apache2/sites-available/yetiforce.conf /etc/apache2/sites-enabled/yetiforce.conf
重启Apache:
$ sudo systemctl restart apache2
5、完成安装
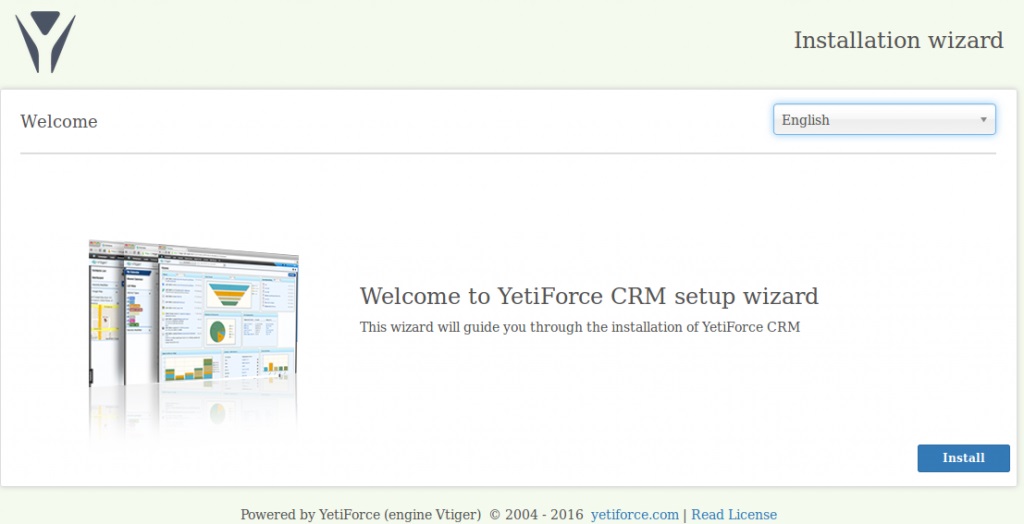
使用浏览器访问:http://your_domain_or_IP
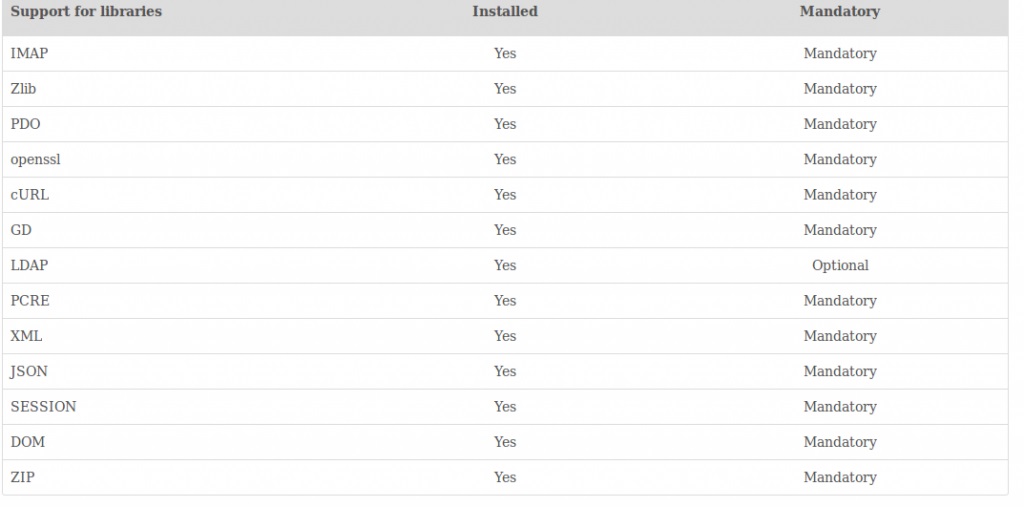
查看系统是否满足安装要求:
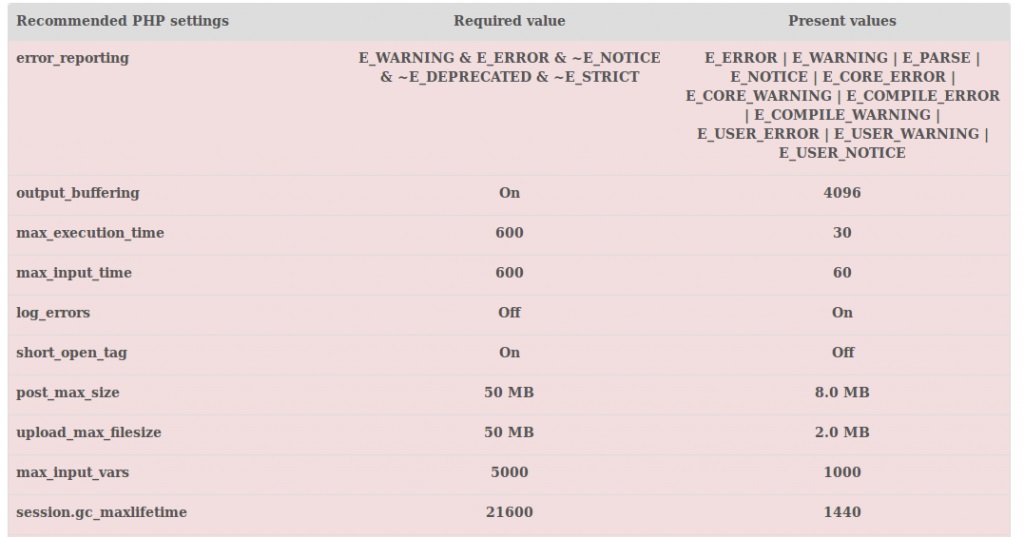
根据建议值配置PHP:
设置数据库连接和管理员:
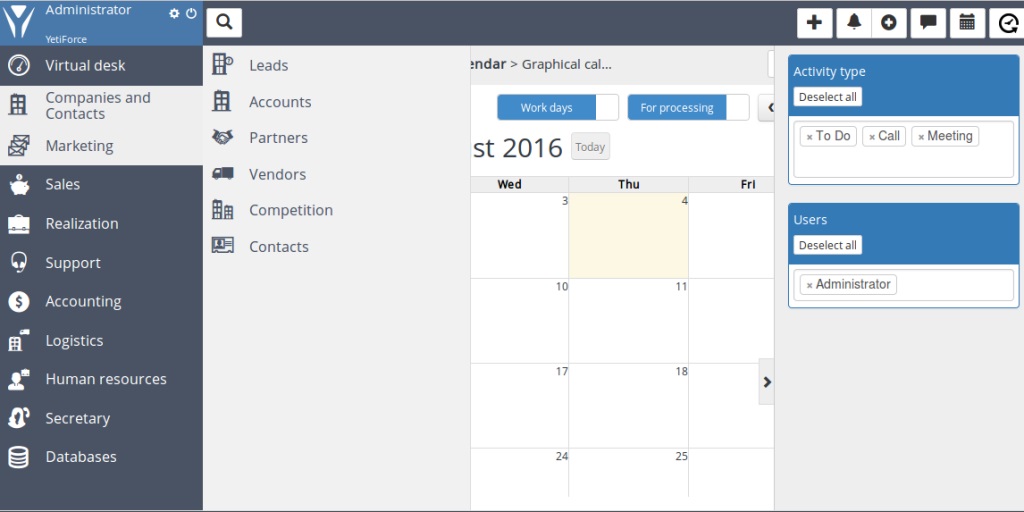
安装完成:
文档:https://yetiforce.com/en/documentation.html

