之前用centos安装了vTPM vtpm-centos(http://www.linuxdiyf.com/linux/22731.html),但是近期任务还是得回到ubuntu上…本次实验采用15.10以及root用户,若使用14.04版本,请先apt-get update && apt-get upgrade && apt-get dist-upgrade。
安装之前
安装依赖包:
apt-get install build-essential libtool automake \
libgmp-dev libnspr4-dev libnss3-dev openssl \
libssl-dev git iasl glib-2.0 libglib2.0-0 \
libglib2.0-dev libtasn1-6-dev tpm-tools \
libfuse-dev libgnutls-dev libsdl1.2-dev \
expect gawk socat libfdt-dev
软件包地址:
libtpms: https://github.com/stefanberger/libtpms
swtpm: https://github.com/stefanberger/swtpm
seabios-tpm: https://github.com/stefanberger/seabios-tpm
qemu-tpm: https://github.com/stefanberger/qemu-tpm
安装seabios-tpm与libtpms
seabios:直接make即可,记住out/bios.bin路径,最好写入环境变量。
git clone https://github.com/stefanberger/seabios-tpm
cd seabios-tpm
make
libtpms:
git clone https://github.com/stefanberger/libtpms
cd libtpms
./bootstrap.sh
./configure --prefix=/usr --with-openssl
make
make install
注:与在centos上安装不同,这里需要带上参数:–with-openssl。源码中默认使用freebl作为加解密库,在ubuntu中出现错误:
could not find AES_CreateContext()...
swtpm安装
git clone https://github.com/stefanberger/swtpm
cd swtpm
./bootstrap.sh
./configure --prefix=/usr --with-openssl
make
make check
sudo make install
cp /usr/etc/swtpm_setup.conf /etc/swtpm_setup.conf
安装qemu-tpm
git clone https://github.com/stefanberger/qemu-tpm
cd qemu-tpm
./configure --enable-kvm --enable-tpm --enable-sdl
make
make install
启动vTPM
创建/dev/vtpm*:
sudo modprobe cuse
mkdir /tmp/myvtpm0
chown -R tss:root /tmp/myvtpm0
swtpm_setup --tpm-state /tmp/myvtpm0 --createek
成功界面为:
[root@localhost swtpm]# swtpm_setup --tpm-state /tmp/myvtpm0 --createek
Starting vTPM manufacturing as tss:tss @ Fri 22 Jan 2016 01:39:43 PM CST
TPM is listening on TCP port 44121.
Ending vTPM manufacturing @ Fri 22 Jan 2016 01:39:44 PM CST
再执行下述命令,能够看到文件/dev/vtpm0。
export TPM_PATH=/tmp/myvtpm0
swtpm_cuse -n vtpm0
创建虚拟机~:
qemu-img create -f qcow2 <YOUR IMG PATH> 30G
qemu-system-x86_64 -display sdl -enable-kvm -cdrom <YOUR ISO PATH> \
-m 1024 -boot d -bios $SEABIOS/bios.bin -boot menu=on -tpmdev \
cuse-tpm,id=tpm0,path=/dev/vtpm0 \
-device tpm-tis,tpmdev=tpm0 <YOUR IMG PATH>
安装虚拟机就和普通安装系统一样,这里不再介绍(我的iso文件是ubuntu-server x64 15.10)。
安装成功后执行(若出现错误,重新执行生成/dev/vtpm0的命令):
qemu-system-x86_64 -display sdl -enable-kvm \
-m 1024 -boot c -bios $SEABIOS/bios.bin -boot menu=on -tpmdev \
cuse-tpm,id=tpm0,path=/dev/vtpm0 \
-device tpm-tis,tpmdev=tpm0 <YOUR IMG PATH>

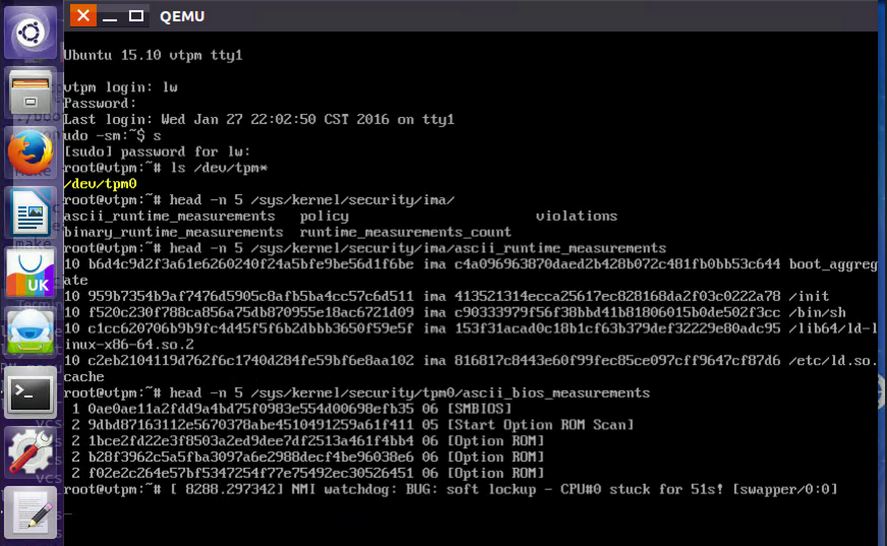
至此,qemu虚拟机里已经能够看到/dev/tpm0了,可以愉快地进行下一步工作了。

