使用Make编译 ArduPilot for Pixhawk 2, Pixhawk and PX4 在linux上.
Note: 编译 Pixhawk 2 and Pixhawk使用 (make px4-v2). 编译 PX4 使用 make px4-v1.
Quick start
系统ubuntu16.04
Setup
安装 git:
sudo apt-get -qq -y install git

安装 arm-none-eabi-gcc编译器
安装gawk,cmake
apt-get install gawk cmake
克隆源码到本地:
git clone https://github.com/diydrones/ardupilot.git
运行ubuntu安装脚本:
ardupilot/Tools/scripts/install-prereqs-ubuntu.sh -y
Reload the path (log-out and log-in to make permanent):
. ~/.profile
Build 编译
以下是编译不同机型 Pixhawk2/Pixhawk 的命令. 编译PX4使用make px4-v2 而不是make px4-v1
To build for PX4 replace make px4-v2 with make px4-v1.
Build for Copter:
cd ardupilot/ArduCopter
make px4-v2
编译过程中出现的问题:

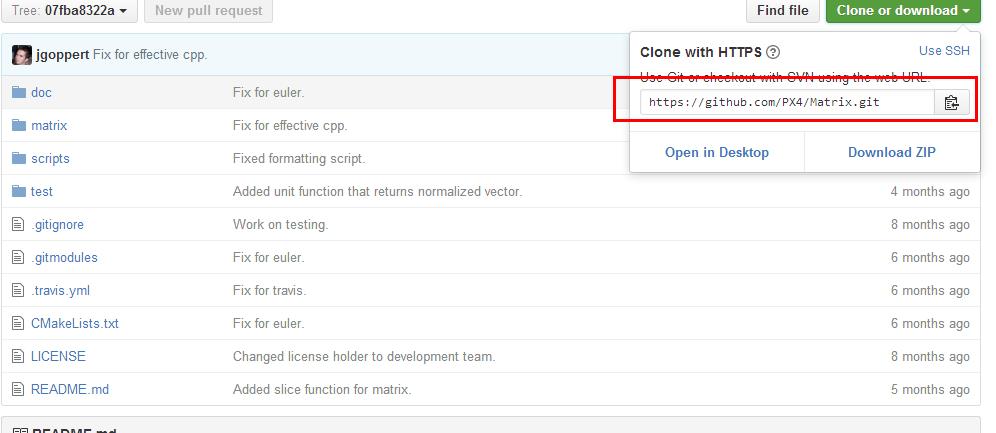
在github上的matrix目录名已经变化,所以找不到,手动git clone下载即可

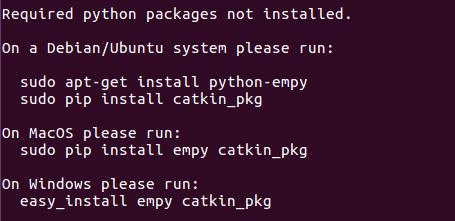
之后又出现的问题是:
少python-empy,pip,catkin-pkg,直接使用apt-get install 安装即可

按照提示少哪个就安装哪个
又出现问题:genromfs没有找到
直接apt-get install genromfs

最后编译成功,生成px4固件文件

Build for Plane:
cd ardupilot/ArduPlane
make px4-v2
Build for Rover:
cd ardupilot/APMrover2
make px4-v2
Build for Antenna Tracker:
cd ardupilot/AntennaTracker
make px4-v2
Building
One you have the 3 git trees and compiler setup you do the build in your vehicle directory. For example, if building Plane then do this:
cd ardupilot/ArduPlane
make px4
That will build two files ArduPlane-v1.px4 and ArduPlane-v2.px4. The v1 file is for PX4v1, the v2 file is for PX4v2 (the Pixhawk).
你可以只编译一个使用 “make px4-v1” or “make px4-v2”.
The first time you build it will take quite a long time as it builds the px4 archives. Subsequent builds will be faster (especially if you setup ccache correctly).
Loading firmware
To load the firmware onto the board use
make px4-v1-upload
or
make px4-v2-upload
After it says “waiting for bootloader” plugin your PX4 on USB.
If upload consistently fails in the erase step then check if you are running ‘modemmanager’ which can take control of the PX4 USB port. Removing modemmanager can help.
Cleaning
If there have been updates to the PX4NuttX or PX4Firmware git submodules you may need to do a full clean build. To do that use:
make px4-clean
that will remove the PX4NuttX archives so you can do a build from scratch

