1. kvm是否启动镜像
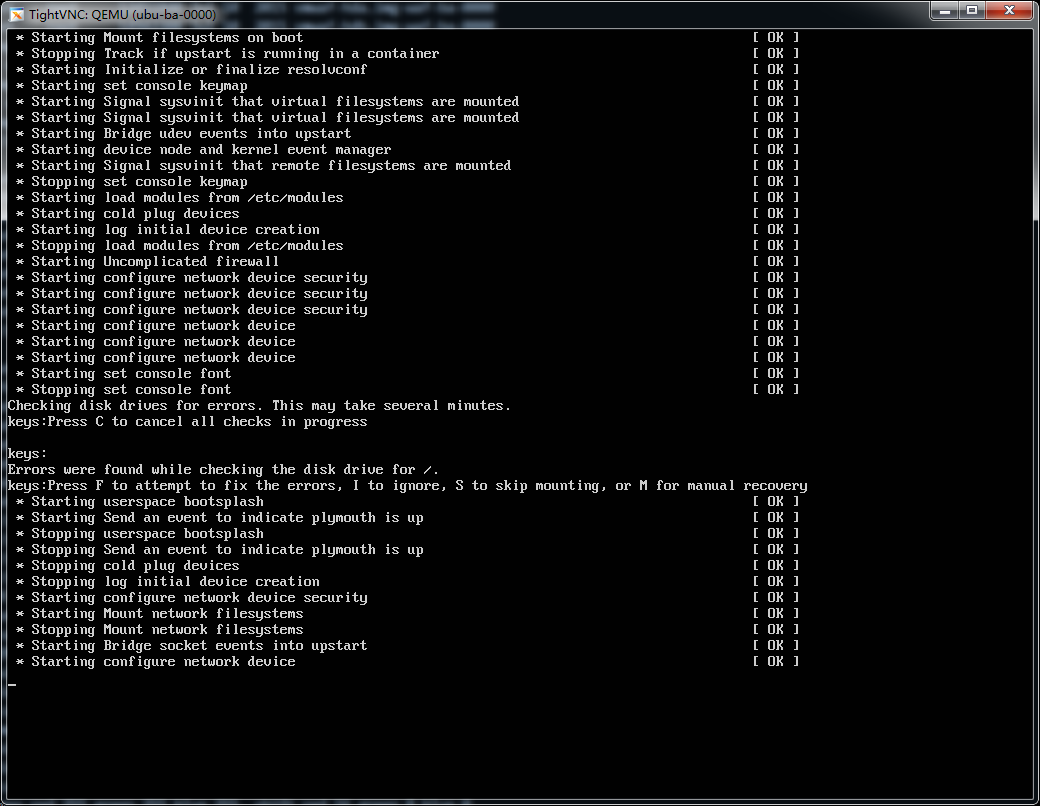
1) 现象:kvm启动qcow2 ubuntu虚拟机过程中,提示
error were found when checking the disk drive for boot

2) 解决方案
镜像硬盘引导坏了,建议更换qcow2镜像。
更换完了镜像:启动后:
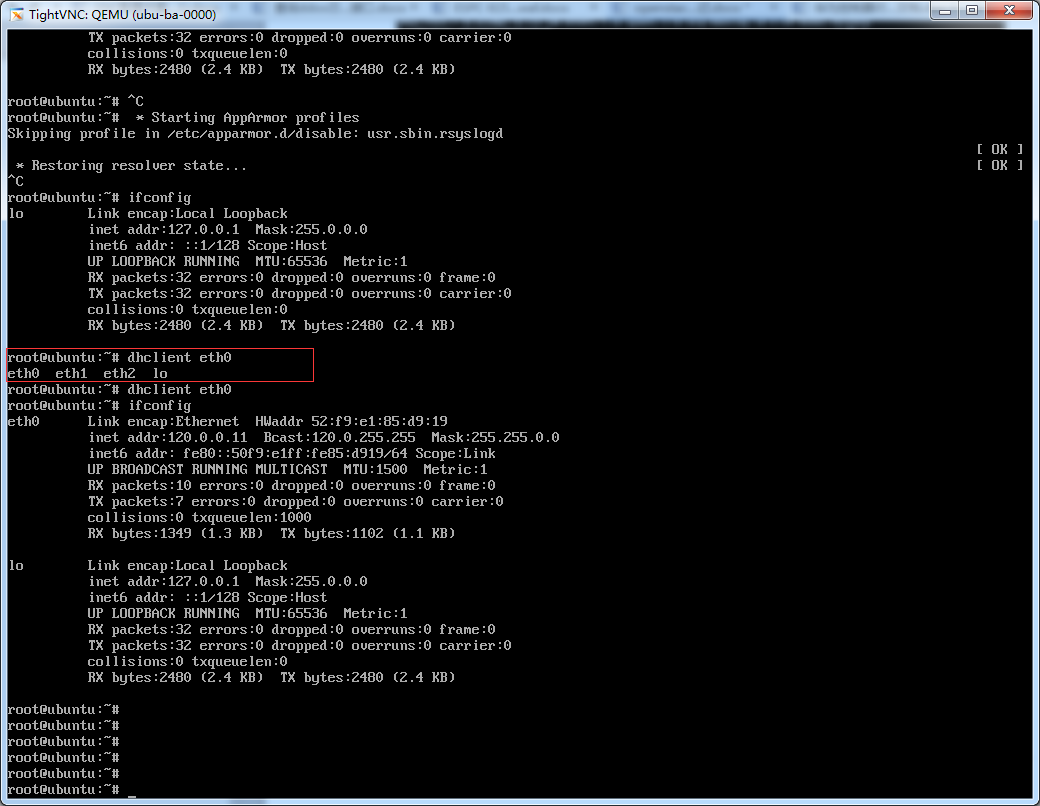
如图所示:有三个网卡driver,说明镜像启动过程中正确配置网卡。

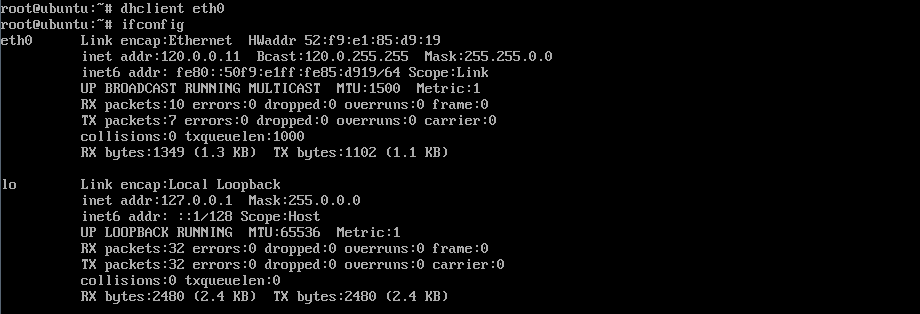
Dhclient eth0可以看到网卡可以正确分配IP地址。

如若不能正确分配Ip,说明dhcp服务dnsmasq没有启动。
重启dhcp服务器
手动配置Ip。见链接:
http://www.linuxdiyf.com/linux/21137.html
2.检查网络链接
1) 检查DNS状态
现象:手动配置Ip地址后发现,可以ping通网关120.0.0.1.但是不能ping通www.baidu.com。说明Dns服务器可能有问题。vi /etc/resolve.conf修改nameserver 192.168.1.4 或者8.8.8.8、8.8.4.4

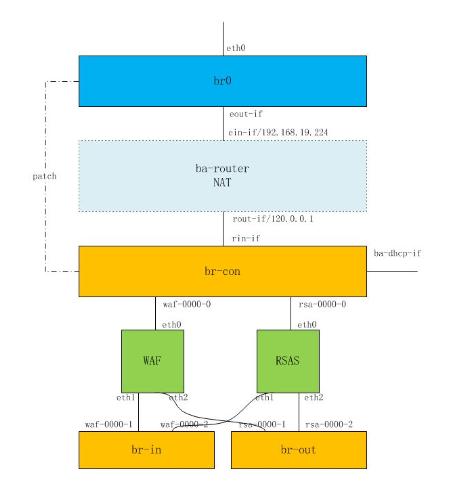
2) 检查网络拓扑链接
现象:DNS正确配置后,去宿主机看发现:ping DNS服务器发现同样ping不通

解决方案:经检查网络拓扑链接ovs-vsctl show没有问题。
举例说明:运行BA run.sh脚本突然Node2节点断了。
1 从其他服务节点ssh上去。查看路由表发现网关均从br0出去…
2 本机流量全部从br0走,接下来查看br0的连接情况
root@node2:~# route -n
Kernel IP routing table
Destination Gateway Genmask Flags Metric Ref Use Iface
0.0.0.0 192.168.19.254 0.0.0.0 UG 0 0 0 br0
3 发现br并没有连接网卡eth0,所以挂上br0即可
Bridge "br0"
Port "br0"
Interface "br0"
type: internal
修改如下:
Bridge "br0"
Port "br0"
Interface "br0"
type: internal
Port "eth0"
Interface "eth0"
3) 检查NAT链接状态

* NAT检查如下。
1. 查看NAT是否开启:有无ba-router
检查NAT各个网口配置状态
root@node2:/opt/zq# ip netns
ba-router
by-router
by-dhcp
root@node2:/opt/zq# ip netns exec ba-router ifconfig
ein-if Link encap:Ethernet HWaddr b2:fd:be:2f:ea:56
inet addr:192.168.19.224 Bcast:192.168.19.255 Mask:255.255.255.0
inet6 addr: fe80::b0fd:beff:fe2f:ea56/64 Scope:Link
UP BROADCAST RUNNING MULTICAST MTU:1500 Metric:1
RX packets:29989 errors:0 dropped:431 overruns:0 frame:0
TX packets:11001 errors:0 dropped:0 overruns:0 carrier:0
collisions:0 txqueuelen:1000
RX bytes:32724214 (32.7 MB) TX bytes:798147 (798.1 KB)
rout-if Link encap:Ethernet HWaddr b6:17:e8:4b:14:f6
inet addr:120.0.0.1 Bcast:120.0.255.255 Mask:255.255.0.0
inet6 addr: fe80::b417:e8ff:fe4b:14f6/64 Scope:Link
UP BROADCAST RUNNING MULTICAST MTU:1500 Metric:1
RX packets:11082 errors:0 dropped:0 overruns:0 frame:0
TX packets:16879 errors:0 dropped:0 overruns:0 carrier:0
collisions:0 txqueuelen:1000
RX bytes:802068 (802.0 KB) TX bytes:31648717 (31.6 MB)
4) 检查NAT路由表状态
由上可知:NAT链接没有问题,所以在查看下NAT路由表:ip netns exec ba-router route -n
现象:查看下路由表route -n,发现没有路由192.168.1.0/24网段无法出去,默认丢弃或者 默认网关192.168.19.254
root@node2:/tmp/zq# ip netns exec ba-router route -n
Kernel IP routing table
Destination Gateway Genmask Flags Metric Ref Use Iface
120.0.0.0 0.0.0.0 255.255.0.0 U 0 0 0 rout-if
192.168.19.0 0.0.0.0 255.255.255.0 U 0 0 0 ein-if
解决方案:添加NAT网关: ip netns exec ba-router route add default gw 192.168.19.254
ip netns exec ba-router route add default gw 192.168.19.254
5) 查看NAT路由表
root@node2:/tmp/zq# ip netns exec ba-router route -n
Kernel IP routing table
Destination Gateway Genmask Flags Metric Ref Use Iface
0.0.0.0 192.168.19.254 0.0.0.0 UG 0 0 0 ein-if
120.0.0.0 0.0.0.0 255.255.0.0 U 0 0 0 rout-if
192.168.19.0 0.0.0.0 255.255.255.0 U 0 0 0 ein-if
6)添加完路由表后,可以ping通google DNS服务器了。
root@node2:/tmp/zq# ip netns exec ba-router ping 8.8.8.8
PING 8.8.8.8 (8.8.8.8) 56(84) bytes of data.
64 bytes from 8.8.8.8: icmp_seq=1 ttl=43 time=59.5 ms
64 bytes from 8.8.8.8: icmp_seq=1 ttl=43 time=59.5 ms
64 bytes from 8.8.8.8: icmp_seq=1 ttl=43 time=59.5 ms
^C
— 8.8.8.8 ping statistics —
1 packets transmitted, 1 received, 0% packet loss, time 0ms
rtt min/avg/max/mdev = 59.574/59.574/59.574/0.000 ms
7)本机路由表:route -n
root@node2:/tmp/zq# route -n
Kernel IP routing table
Destination Gateway Genmask Flags Metric Ref Use Iface
0.0.0.0 192.168.19.254 0.0.0.0 UG 0 0 0 br0
20.0.0.0 0.0.0.0 255.255.255.0 U 0 0 0 eth1
120.0.0.0 0.0.0.0 255.255.0.0 U 0 0 0 ba-dhcp-if
172.17.0.0 0.0.0.0 255.255.0.0 U 0 0 0 docker0
192.168.19.0 0.0.0.0 255.255.255.0 U 0 0 0 br0
192.168.122.0 0.0.0.0 255.255.255.0 U 0 0 0 virbr0

