1.下载OpenLDAP源码
http://www.openldap.org/software/download/
或者
ftp://ftp.openldap.org/pub/OpenLDAP/openldap-release.tgz
2.解压到本地
# gunzip-c openldap-VERSION.tgz | tar xf -
# cd openldap-2.4.44
# ./configure
configure: error: BDB/HDB: BerkeleyDB notavailable
提示本地没有安装BerkeleyDB数据库
3.安装BerkeleyDB
去Oracle官网下载:
http://www.oracle.com/technetwork/database/database-technologies/berkeleydb/downloads/index.html
解压到本地

切换到build_unix 目录
# cd build_unix
# ../dist/configure
# make
# make install
root@cloudsoar-virtual-machine:/home/cloudsoar/db-6.2.23/build_unix#make install
Installing DB include files:/usr/local/BerkeleyDB.6.2/include ...
Installing DB library:/usr/local/BerkeleyDB.6.2/lib ...
libtool: install: cp -p .libs/libdb-6.2.so/usr/local/BerkeleyDB.6.2/lib/libdb-6.2.so
libtool: install: cp -p .libs/db_upgrade/usr/local/BerkeleyDB.6.2/bin/db_upgrade
libtool: install: cp -p .libs/db_verify/usr/local/BerkeleyDB.6.2/bin/db_verify
Installing documentation:/usr/local/BerkeleyDB.6.2/docs ...
4.查看安装

5.设置到系统变量
不设置的话,等下安装OpenLDAP时候执行./configure检查时候还会报同样的错
# vim /etc/ld.so.conf
添加一行:/usr/local/BerkeleyDB.6.2/lib/
保存退出。
执行生效:# ldconfig –v
6.继续安装openldap-2.4.44

切换到openldap的源码目录下,重新执行configure文件
# ./configure CPPFLAGS="-I/usr/local/BerkeleyDB.6.2/include-D_GNU_SOURCE" LDFLAGS="-L/usr/local/BerkeleyDB.6.2/lib"
执行后报错
error: BerkeleyDB version incompatible withBDB/HDB backends
这里找不到原因,后来查看openladp-2.4.44,目录的README文件发现如下内容:

原来openldap-2.4.44要求用Oracle Berkeley 4.4-4.8或者5.0-5.1版本的,而我用的是db-6.2.23.tar.gz版本的。
没办法,只有重新去Oracle官网下载一个db-5.1.29.tar.gz版本的。
按照安装Berkeley 6.2的方法再次安装Berkeley DB 5.1。
# cd build_unix
# ../dist/configure
# make
# make install
# vim /etc/ld.so.conf
添加一行:/usr/local/BerkeleyDB.5.1/lib/
保存退出。
执行生效:ldconfig –v
8.安装openldap
切换到openldap-2.4.44目录
# ./configure CPPFLAGS="-I/usr/local/BerkeleyDB.5.1/include-D_GNU_SOURCE" LDFLAGS="-L/usr/local/BerkeleyDB.5.1/lib"
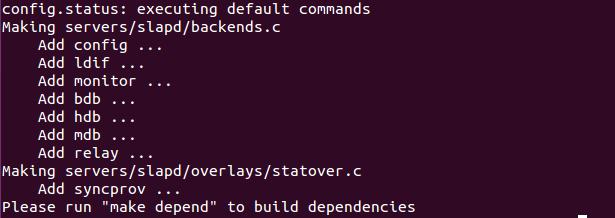
执行完毕可以看到提示我执行make depand了

9.编译软件
根据http://www.openldap.org/doc/admin24/install.html的安装步骤继续执行
执行命令:# make depend

执行命令:# make
10.测试软件
根据官方文档说明:Once the software has been properly configured and successfullymade, you should run the test suite to verify the build.
我们也需要测试一下安装是否成功,执行命令:# make test

说明安装环境是没问题了。
11.安装openldap到系统
根据官方文档说明:By default OpenLDAP Software is installed in /usr/local. If youchanged this setting with the --prefix configure option, it will be installedin the location you provided.
我们可以加–prefix 参数来指定我们自己想要安装的位置。默认是安装到 /usr/local目录下。
执行命令:# su root -c 'make install'

到这里openldap-2.4.44已经成功的安装到我的系统当中。默认的配置文件在 /usr/local/etc/openldap 下。

