1.今天由于openCV环境的原因。在VirtualBox 虚拟机下装了一个Ubuntu 镜像,系统是采用纯净的镜像,所以Vim用的话都要自己安装。
2.安装了一些必要的软件后。也顺利的搭建openCV3环境。因为跟Win7之间交互要通过共享文件加来使用导致非常麻烦。
3.所以也搭建了一个简单的samba服务器。( 作用 :实现Linux和Windows进行文件共享的一个服务器组件,主要是windows访问Linux。) 因为是自己使用,所以没有密码
4.因为之前也是配置过samba,但是自己这次又弄了一次,是有浪费了不少时间。所以总结一下,下面是步骤
5.一般我们虚拟里面网络默认是通过 ”网络地址转换与到win7中连接的网“,
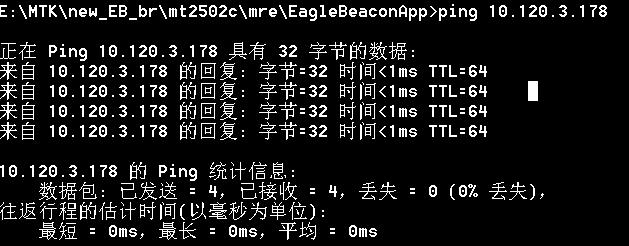
所以为了确定下需要在终端:Ubuntu 和win7 互相ping 一下看是否互通,若只是网络地址转换方式的只有虚拟机可以ping通win7 ,而win 7不能ping 通虚拟机。

6.所以在关掉虚拟里面系统,然后在Virtual Box 设置——网络——再添加一张网卡,弄为桥接方式。
7.然后重新开启unbuntu系统,与win7互相ping一下 结果是通的。(注意这时候虚拟下有两张网卡,所以现在用桥接网卡网址,我的网址就从 10.)

弄到这里网络已经好了(虚拟机ping 主机本来就是通的,就不列出了)
8.在ubuntu 下执行 sudo apt-get install samba 就等安装好samba了
因为 selinux默认ubuntu不安装,iptables默认也是全开放的. 但是若是设置了话。
9.关闭防火墙,先执行service iptables status 命令查看防火墙状态,
如果显示iptables: unrecognized service 说明没有安装,或者安装后没设置没启用。这时候就不用关闭了。也可以
用sudo iptables -L -n 查看是否配置了
如果提示:
Chain INPUT (policy ACCEPT)
target prot opt source destination
Chain FORWARD (policy ACCEPT)
target prot opt source destination
Chain OUTPUT (policy ACCEPT)
target prot opt source destination 说明没有配置。
要是防火墙正常的:执行此命令 sudo ufw disable (ubuntu下的命令 别的Linux 系统可能不同 )
10.关闭 SeLinux
执行 setenforce 0 来关闭。
永久关闭 vim /etc/selinux/config //把SELINUX=enforcing改成 SELINUX=disabled
若此文件不存在就不用管了,说明没有安装好!也就是没启动作用
11.至此samba需要正常运行的路已经铺好了
开始配置:我自己话已经配置一个常用的smb.conf 文件。
先是 sudo mv vim /etc/samba/smb.conf smb.conf_src_file 保存源文件
sudo vim /etc/samba/smb.conf 这个新建的文件
添加:
[global]
server string = %h server (Samba, Ubuntu)
map to guest = Bad User
obey pam restrictions = Yes
pam password change = Yes
passwd program = /usr/bin/passwd %u
passwd chat = *Enter\snew\s*\spassword:* %n\n *Retype\snew\s*\spassword:* %n\n *password\supdated\ssuccessfully* .
unix password sync = Yes
syslog = 0
log file = /var/log/samba/log.%m
max log size = 1000
dns proxy = No
usershare allow guests = Yes
panic action = /usr/share/samba/panic-action %d
idmap config * : backend = tdb
wide links = Yes
guest account = frankenteinban
[ubuntu1404_share]
path = /home/frankenteinban/work (这一行根据自己要用的目录来配就好)
read only = No
create mask = 0664
directory mask = 0775
guest ok = Yes
保存好此文件后,就可以 重启ubuntu了。
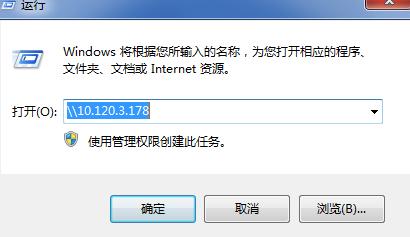
12.然后 win7 ——开始运行 输入你的网址
如图

进入了就是

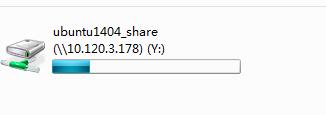
为了以后方便右键上图中的文件夹,选择 ”映射网络驱动器 随便选个盘“
结果就是:

Ubuntu终端访问samba服务器:http://www.linuxdiyf.com/linux/15714.html
低版本的linux系统装samba服务器:http://www.linuxdiyf.com/linux/13464.html
Ubuntu15.04安装samba服务:http://www.linuxdiyf.com/linux/12925.html
fedora 22 samba使用:http://www.linuxdiyf.com/linux/14185.html
如何在Fedora或CentOS上使用Samba共享文件夹:http://www.linuxdiyf.com/linux/12396.html

