从整体上来说,安装过程并不算太复杂,参考ndnSIM2.0的官网(http://ndnsim.net/2.0/getting-started.html)往下走就可以了,不过一不小心还是会出现莫名其妙的错误。此处就记录下自己的安装步骤吧。
第一步:解决库依赖问题
下载必要组件:
sudo apt-get install build-essential
sudo apt-get install libsqlite3-dev libcrypto++-dev
sudo apt-get install libboost-all-dev【注:这步我安装的时候出错了,所以自己下载boost单独编译,如下】
下载可选组件:
sudo apt-get install python-dev python-pygraphviz python-kiwi
sudo apt-get install python-pygoocanvas python-gnome2
sudo apt-get install python-rsvg ipython
sudo apt-get install libbz2-dev
sudo apt-get install mpi-default-dev
第二步:下载必要源码
下载ndnSIM2.0源代码:
注:前提是已经把git安装上了,如果没有的话,地址栏中输入指令中的网址,自己下载源码。
mkdir ndnSIM
cd ndnSIM
git clone https://github.com/named-data/ndn-cxx.git ndn-cxx
git clone https://github.com/cawka/ns-3-dev-ndnSIM.git ns-3
git clone https://github.com/cawka/pybindgen.git pybindgen
git clone https://github.com/named-data/ndnSIM.git ns-3/src/ndnSIM
安装boost
注:如果运行libboost-all-dev成功的同学可以略过“安装boost”和“测试boost”这两个步骤。
此时将第一步中下载好的boost(http://www.boost.org/users/download/#live)解压到ndnSIM目录下。
cd boost_1_58_0
./bootstrap.sh
完成之后,修改boost_1_58_0/tools/build/example中的user-config.jam文件,在最后面添加
using mpi ;注:"mpi" 与 ";" 之间有个空格
运行,输入
./b2
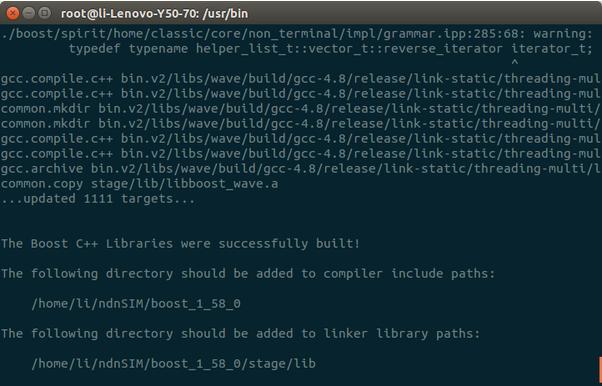
注:如果正确编译完成,会分别给出library和include的地址,如图1所示。
测试boost
创建c++文件,命名为example.cpp,然后调用boost库的函数检测下是否正确
#include <boost/lambda/lambda.hpp>
#include <iostream>
#include <iterator>
#include <algorithm>
int main()
{
using namespace boost::lambda;
typedef std::istream_iterator<int> in;
std::for_each(in(std::cin), in(), std::cout << (_1 * 3) << " " );
}
运行输入:
g++ -I /home/li/ndnSIM/boost_1_58_0 example.cpp -o example
注:该地址也就是boost安装的地址,我的安装在 /home/li/ndnSIM/boost_1_58_0
运行:
./example
随便输入数字,查看结果是否正确。如果没有出错,恭喜你,安装成功。
第三步:编译
进入ndn-cxx目录,运行./waf
cd ndnSIM/ndn-cxx
./waf configure --boost-includes=/home/li/ndnSIM/boost_1_58_0 --boost-libs=/home/li/ndnSIM/boost_1_58_0/stage/lib
./waf -j4
sudo ./waf install
注:此处configure后面的地址分别为编译boost成功后给出的地址。
-j4即使用4核同时编译,增加编译速度,具体数值需根据自己的电脑内核数来设置。
进入ns-3目录,运行./waf
cd ndnSIM/ns-3
./waf configure --boost-includes=/home/li/ndnSIM/boost_1_58_0 --boost-libs=/home/li/ndnSIM/boost_1_58_0/stage/lib --enable-examples
./waf -j4
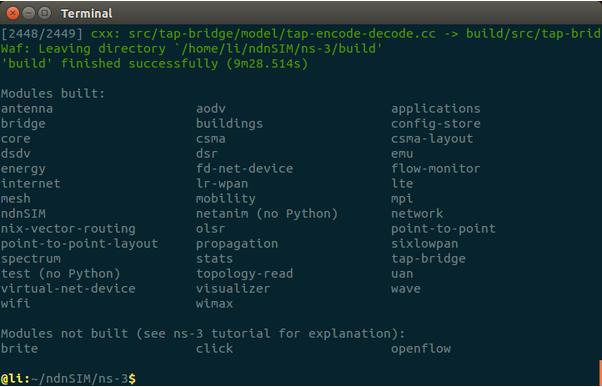
如果不出意外,那么编译成功,结果如图2所示
运行以下指令查看安装是否正确。
./waf --run=ndn-simple
./waf --run=ndn-grid --vis

图1:

图2:
出现的问题:
请不要使用太高版本的gcc编译boost,比如gcc 5.1.0,否则每次运行"./waf configure"和“./waf”的时候错的莫名其妙
如果运行附加选项“--vis”时出现错误,请查看是否在在配置的时候加入了“--disable-python”选项
如果不想使用例子,想自己编写脚本,那么请记得运行
./waf configure -d optimized
./waf -j4

