OK6410的Boa服务器移植:
<一> Boa的编译
1. 从 www.boa.org 下载 Boa 服务器的最新版:boa-0.94.13.tar.gz。
2. 解压:tar xzf boa-0.94.13.tar.gz
3. 进入解压后的文件夹 boa-0.94.13内部的 src文件夹,对源文件进行如下修改
由于arm-linux-gcc 编译器版本过高,对语法的支持有一些改变,所以需要修改compat.h中的
#define TIMEZONE_OFFSET(foo) foo##->tm_gmtoff
为:
#define TIMEZONE_OFFSET(foo) foo->tm_gmtoff
不然在编译的时候会提示如下错误:
util.c: 100: 1: pasting “t” and “->” does not give a valid preprocessing token make: [util.o] Error1
将boa.c 文件225-227三行的文件注释掉
if (setuid(0) != -1) {
DIE(”icky Linux kernel bug!”);
}
为
/*
if (setuid(0) != -1) {
DIE(”icky Linux kernel bug!”);
}
*/
否则,但以root权限启动boa服务器的时候,会出现以下错误:boa.c:226 - icky Linux kernel bug!:
4. 然后生成Makefile:./configure
5. 修改生成的Makefile:默认生成的Makefile针对x86平台,我们的目标是针对嵌入式平台,所以需要修改编译器.
更改Makefile的31行和32行:
CC = gcc
CPP = gcc -E
更改为
CC = arm-linux-gcc
CPP = arm-linux-gcc -E
6. 在当前目录下编译Boa源文件: make
7. 将生成好的boa可执行文件去掉冗余信息: arm-linux-strip boa. 如下图为strip 前后boa的大小对比。

<二> 将Boa移植到OK6410中
1. 修改boa.conf配置文件:
(1) 修改25行的port端口,用来设置服务器监听的端口:
# Port: The port Boa runs on. The default port for http servers is 80.
# If it is less than 1024, the server must be started as root.
Port 80
(2) 注释43行的监听IP地址:默认监听该主机上的所有IP地址
#Listen 192.68.0.5
(3) 修改53、54行的user和Group 启动的UID和GID,使其以root身份启动
# User: The name or UID the server should run as.
# Group: The group name or GID the server should run as.
User root
Group root
(4) 修改116行的DocumentRoot地址,即客户端要显示的HTML页面存放位置
# DocumentRoot: The root directory of the HTML documents.
# Comment out to disable server non user files.
DocumentRoot /usr/local/boa
(5) 修改输入网页输入主机IP时要显示的页面:这里设为index.html
# DirectoryIndex: Name of the file to use as a pre-written HTML
# directory index. Please MAKE AND USE THESE FILES. On the
# fly creation of directory indexes can be _slow_.
# Comment out to always use DirectoryMaker
DirectoryIndex index.html
26 (6) 修改CGI程序存放的位置:以http://IP/cgi-bin/cginame 的方式运行cgi 程序时将在/usr/local/boa/cgi-bin 目录下寻找该程序
# ScriptAlias: Maps a virtual path to a directory for serving scripts
# Example: ScriptAlias /htbin/ /www/htbin/
ScriptAlias /cgi-bin/ /usr/local/boa/cgi-bin/
2. 将配置文件boa.conf 移动到OK6410的 /etc/boa/ 目录下。
3. 创建/var/log/boa/ 目录,这样Boa服务器启动时会在该目录下创建日志文件。
4. 将Linux系统上/etc/mime.types 文件复制到OK6410的/etc 目录下,否则Boa服务器启动不起来。
5. 将生成的boa文件移植到嵌入式板中的/sbin目录下并更改脚本文件 /etc/init.d/rcS, 新增一行: /sbin/boa ,确保boa服务器随系统上电自启动。
这里一定要注意:有时候boa服务器并不能随系统启动,运行 /sbin/boa 命令会提示:
gethostbyname:: Success
这种情况下要修改boa.conf 文件
将
#ServerName www.your.org.here
改为
ServerName www.your.org.here
即去掉注释即可
<三> 测试Boa服务器:
1. 静态页面测试:
<!DOCTYPE html PUBLIC "-//W3C//DTD XHTML 1.0 Transitional//EN" "http://www.w3.org/TR/xhtml1/DTD/xhtml1-transitional.dtd">
<html xmlns="http://www.w3.org/1999/xhtml">
<head>
<meta http-equiv="Content-Type" content="text/html; charset=utf-8" />
<title>Boa 静态网页测试</title>
</head>
<body>
<h1> Welcome to Boa sever! </h1>
</body>
</html>

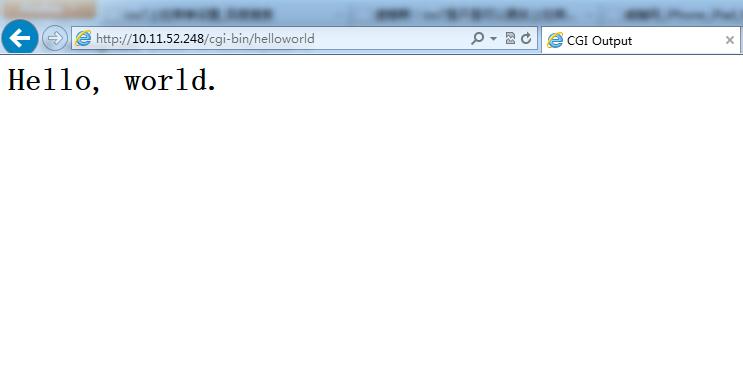
2. CGI 程序测试:
#include <stdio.h>
int main()
{
printf("Content-type: text/html\n\n");
printf("<html>\n");
printf("<head>\n");
printf("<title>CGI Output</title>\n");
printf("</head>\n");
printf("<body>");
printf("<h1> Hello, world. </h1>");
printf("</body>");
printf("</html>\n");
return 0;
}

至此,Boa服务器移植完成。
Ubuntu(pc)中部署boa服务器:http://www.linuxdiyf.com/linux/15020.html

