在Ubuntu.Components 1.2中有一个新的控件叫做ListItem(https://developer.ubuntu.com/api/apps/qml/sdk-15.04/Ubuntu.Components.ListItem/)。它只出现在15.04的手机的Image中,所以对14.10手机的用户来说这个是不可以用的。就像API文档中提到的那样,它是为了为Ubuntu手机中的List及Grid来提供一个标准的设计而设计的。
说道ListItem,可能很多人和Ubuntu.Components.ListItems(https://developer.ubuntu.com/api/apps/qml/sdk-15.04/Ubuntu.Components.ListItems/)容易搞混。其实ListItem没有任何的layout,也就是说它可以很方便地让我们定制任何一个我们所需要的内容。相反,Ubuntu.Components.ListItems(https://developer.ubuntu.com/api/apps/qml/sdk-15.04/Ubuntu.Components.ListItems/)不可以让我们方便地定制我们所需要的高度。它的高度是固定,也有一些适合我们做List及Grid的layout。
为了说明问题,我们做了如下的测试应用:
import QtQuick 2.0
import Ubuntu.Components 1.2
import Ubuntu.Components.ListItems 1.0 as ListItems
/*!
\brief MainView with a Label and Button elements.
*/
MainView {
// objectName for functional testing purposes (autopilot-qt5)
objectName: "mainView"
// Note! applicationName needs to match the "name" field of the click manifest
applicationName: "listitem.liu-xiao-guo"
/*
This property enables the application to change orientation
when the device is rotated. The default is false.
*/
//automaticOrientation: true
width: units.gu(60)
height: units.gu(85)
Page {
title: i18n.tr("ListItem")
clip:true
Flickable {
height: parent.height
width: parent.width
contentHeight: content.childrenRect.height
Column {
id: content
anchors.fill: parent
ListItems.Standard {
text: "Selectable standard list item"
selected: false
onClicked: selected = !selected
}
ListItems.Standard {
text: "List item with icon"
iconName: "compose"
}
ListItems.Standard {
text: "With a progression arrow"
progression: true
}
ListItems.Standard {
text: "Control"
control: Button {
text: "Click me"
width: units.gu(19)
onClicked: print("Clicked")
}
progression: true
}
ListItem {
id: listItem
height: 200
Row {
spacing: 20
Image {
width: 200
height: 200
source: "images/pic1.jpg"
fillMode: Image.PreserveAspectCrop
}
Button {
text: "Press me"
onClicked: {
console.log("Button is clicked");
listItem.destroy();
}
}
}
onClicked: console.log("clicked on ListItem")
}
ListItem {
leadingActions: ListItemActions {
actions: [
Action {
iconName: "delete"
onTriggered: {
console.log("delete is triggered");
}
}
]
}
Label {
text: "LeadingAction"
}
onClicked: console.log("clicked on ListItem with leadingActions set")
}
ListItem {
trailingActions: ListItemActions {
actions: [
Action {
iconName: "edit"
onTriggered: {
console.log("edit is triggered!");
}
}
]
}
Label {
text: "TrailingActions"
}
onClicked: console.log("clicked on ListItem with trailingActions set")
}
ListItem {
Label {
text: "onClicked implemented"
}
onClicked: console.log("clicked on ListItem with onClicked implemented")
}
ListItem {
Label {
text: "onPressAndHold implemented"
}
onPressAndHold: console.log("long-pressed on ListItem with onPressAndHold implemented")
}
ListItem {
Label {
text: "No highlight"
}
onClicked: console.log("clicked on No highlight");
}
ListView {
clip: true
width: parent.width
height: units.gu(50)
model: ListModel {
Component.onCompleted: {
for (var i = 0; i < 100; i++) {
append({tag: "List item #"+i});
}
}
}
delegate: ListItem {
Label {
text: modelData
}
color: dragMode ? "lightblue" : "lightgray"
onPressAndHold: ListView.view.ViewItems.dragMode =
!ListView.view.ViewItems.dragMode
}
ViewItems.onDragUpdated: {
if (event.status == ListItemDrag.Moving) {
model.move(event.from, event.to, 1);
}
}
moveDisplaced: Transition {
UbuntuNumberAnimation {
property: "y"
}
}
}
}
}
}
}
在这里我们一定要注意的是:我们必须使用
import Ubuntu.Components 1.2
才可以使用ListItem。
在这里,我们也使用了“ListItems.Standard”(https://developer.ubuntu.com/api/apps/qml/sdk-15.04/Ubuntu.Components.ListItems.Standard/)来展示它和ListItem的不同。就像我们看到的那样:
ListItem {
id: listItem
height: 200
Row {
spacing: 20
Image {
width: 200
height: 200
source: "images/pic1.jpg"
fillMode: Image.PreserveAspectCrop
}
Button {
text: "Press me"
onClicked: {
console.log("Button is clicked");
listItem.destroy();
}
}
}
onClicked: console.log("clicked on ListItem")
}
ListItem可以自定义我们想要的高度200,但是ListItems做不到。这里我们画上一幅图,加上一个按钮。
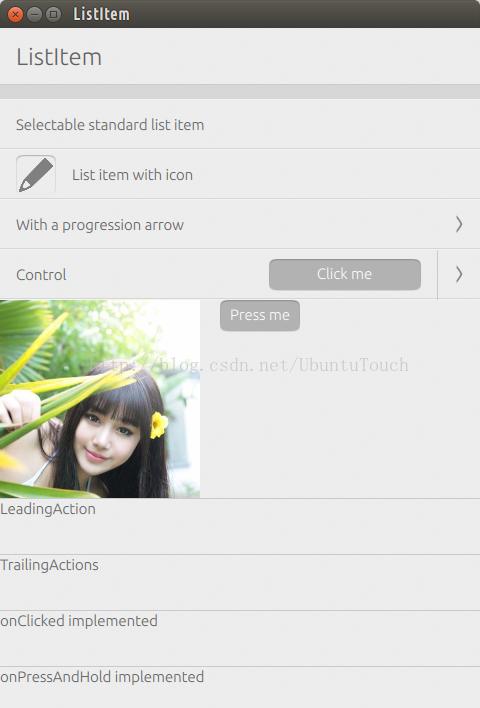
另外,我们可以通过如下的代码:
ListItem {
leadingActions: ListItemActions {
actions: [
Action {
iconName: "delete"
onTriggered: {
console.log("delete is triggered");
}
}
]
}
Label {
text: "LeadingAction"
}
onClicked: console.log("clicked on ListItem with leadingActions set")
}
ListItem {
trailingActions: ListItemActions {
actions: [
Action {
iconName: "edit"
onTriggered: {
console.log("edit is triggered!");
}
}
]
}
Label {
text: "TrailingActions"
}
onClicked: console.log("clicked on ListItem with trailingActions set")
}
来实现leadingActions或trainingActions:
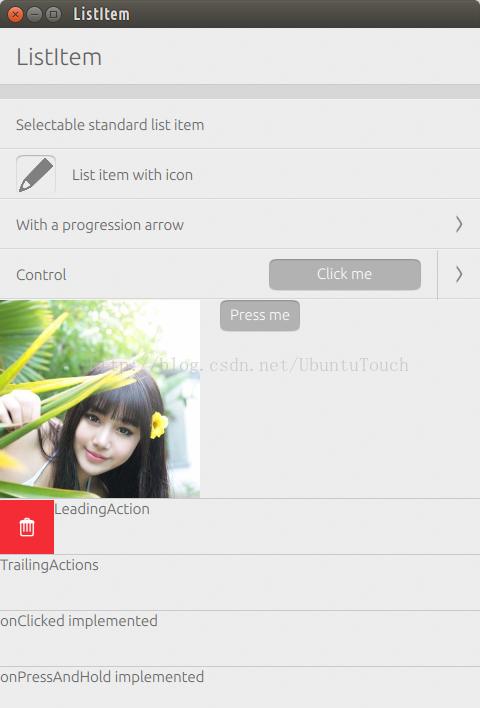
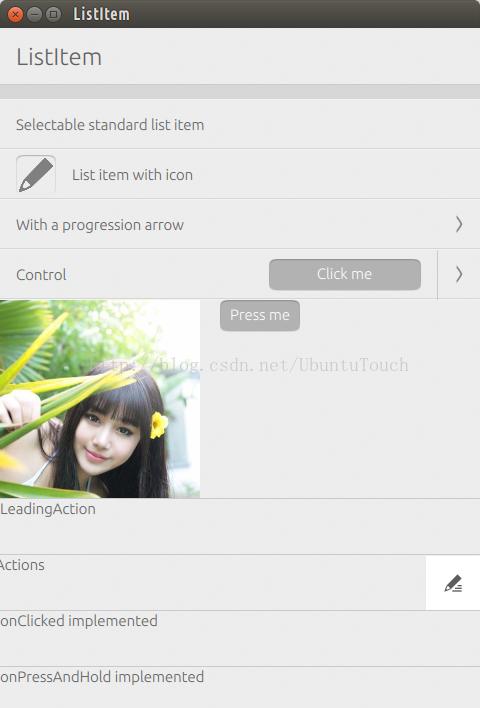
在应用的最后面,我们使用了一个ListView,并在ListView中使用ListItem。我们可以在ListView中长按列表中的内容,从而进入到可以drag-and-drop的模式,我们可以在列表中任意移动我们所需要的内容到我们想要的位置:
ListView {
clip: true
width: parent.width
height: units.gu(50)
model: ListModel {
Component.onCompleted: {
for (var i = 0; i < 100; i++) {
append({tag: "List item #"+i});
}
}
}
delegate: ListItem {
Label {
text: modelData
}
color: dragMode ? "lightblue" : "lightgray"
onPressAndHold: ListView.view.ViewItems.dragMode =
!ListView.view.ViewItems.dragMode
}
ViewItems.onDragUpdated: {
if (event.status == ListItemDrag.Moving) {
model.move(event.from, event.to, 1);
}
}
moveDisplaced: Transition {
UbuntuNumberAnimation {
property: "y"
}
}
}
}
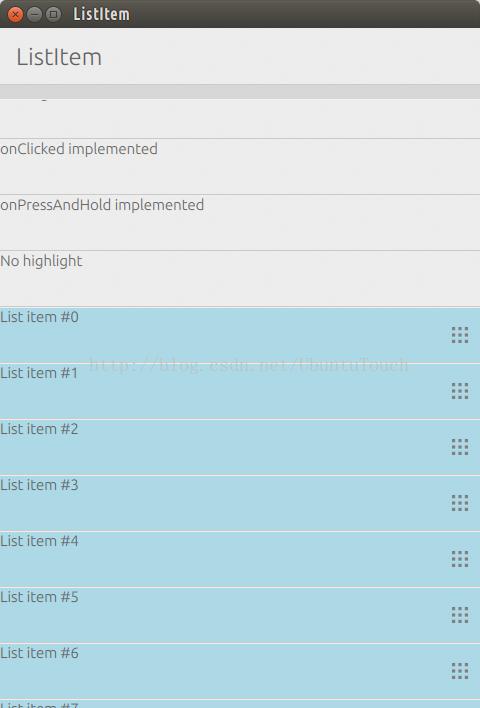
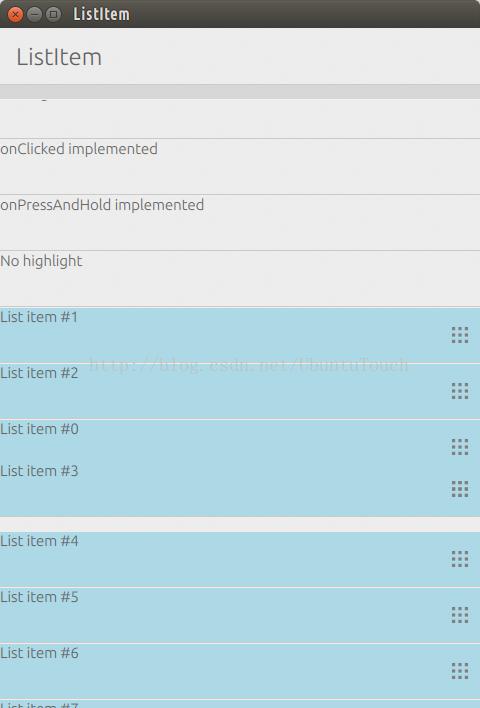
整个项目的源码在:git clone https://gitcafe.com/ubuntu/listitem.git
如何利用Ubuntu Clipboard来复制并粘贴内容:http://www.linuxdiyf.com/linux/12279.html

