首先说一下我的Ubuntu版本,敲命令
sudo lsb_release -a
就可以看到
No LSB modules are available.
Distributor ID: Ubuntu
Description: Ubuntu 14.04.3 LTS
Release: 14.04
Codename: trusty
所以,我的Ubuntu版本是14.04
也可以用
cat /etc/issue
查看版本号。
怎样查看系统是32位还是64位呢?
用命令 uname -m
然后显示:x86_64,这就说明是64位。
安装:
1.去http://nchc.dl.sourceforge.net/project/bochs/bochs/2.4.5/bochs-2.4.5.tar.gz 下载【bochs-2.4.5.tar.gz】
2.解压下载的源代码:
sudo tar zxvf bochs-2.4.5.tar.gz
3.进入bochs-2.4.5目录,运行configure脚本:
sudo ./configure –enable-debugger –enable-disasm
(–enable-debugger和 –enable-disasm 表示开启调试和反汇编功能)
4.第3步正确运行后,会产生一个Makefile文件,于是可以编译:
sudo make
5.安装:
sudo make install
至此,bochs安装已经结束。
但是你也许不会成功。不要着急,下面是编译安装过程中可能出现的一些问题及解决方法:
【错误1】
error: C++ preprocessor “/lib/cpp” fails sanity check
因为Bochs是用C++写的,所以这里要安装GNU g++编译器。
解决方法:
sudo apt-get install build-essential
sudo apt-get install g++
【错误2】
checking for default gui on this platform… x11
ERROR: X windows gui was selected, but X windows libraries were not found.
解决方法:
sudo apt-get install xorg-dev
【错误3】
ERROR: pkg-config was not found, or unable to access the gtk+-2.0 package.
解决方法:
sudo apt-get install libgtk2.0-dev
【错误4】
make的时候提示 /usr/bin/ld: gui/libgui.a(gtk_enh_dbg_osdep.o): undefined
reference to symbol pthread_create@@GLIBC_2.1 //
lib/i386-linux-gnu/libpthread.so.0: error adding symbols: DSO missing
from command line collect2: error: ld r
解决方法:
在makefile的“LIB = ”的后面添加如下内容 :
lz -lrt -lm -lpthread
如果已经安装成功,那么我们肯定迫不及待地想用起来。
怎么用呢?这里举一个例子。
1.下载linux0.11的镜像文件
下载地址是:
http://www.oldlinux.org/Linux.old/images/bootroot-0.11
2.写一个简单的Bochs配置文件
#注意'#'后面为注内容
megs:128
#模拟器的内存
romimage:file=/usr/local/share/bochs/BIOS-bochs-latest
#这个是BIOS-bochs-latest的路径,自己慢慢找,不一定和我的一样
vgaromimage:file=/usr/local/share/bochs/VGABIOS-lgpl-latest
#这个是VGABIOS-lgpl-latest的路径,自己慢慢找
floppya:1_44=bootroot-0.11,status=inserted
#这个是启动软盘,就是我们下载的那个,就在当前目录下,如果不在当前目录,需要指明路径
boot:floppy
#表示从软盘启动
log:bochsout.txt
#日志输出文件
#选项还有很多,想了解更多可以参照原始的.bochsrc(在bochs-2.4.5/目录下)
假设我们保存为bochs_cfg.txt
3.启动Bochs
我们敲命令:
bochs -f bochs_cfg.txt
(-f 选项表示指定配置文件)
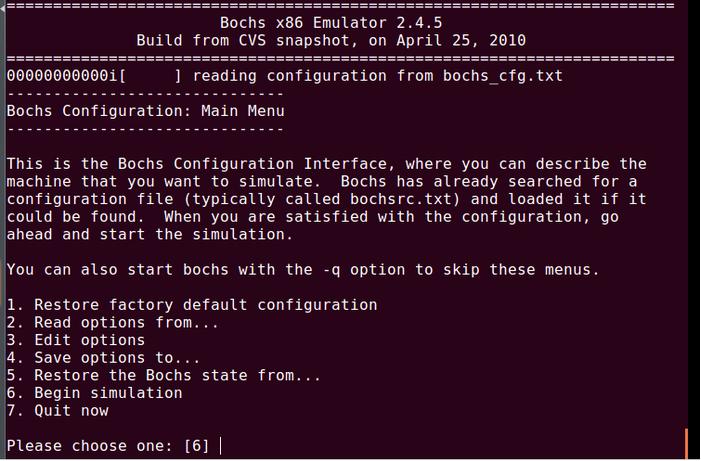
然后我们就看到:

启动Bochs后
输入6,回车
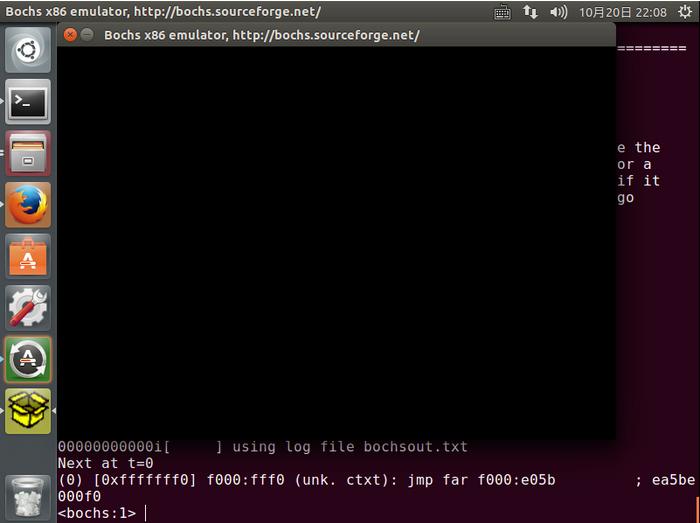
然后看到:

咦?怎么是一片漆黑呢?
注意到了吗?屏幕底端显示:
[0xfffffff0] f000:fff0 (unk. ctxt): jmp far f000:e05b
处理器在加电启动时,CS=0xF000; IP=0xFFF0,也就是说地址线的低20位是0xFFFF0,且其他地址线被强制为高电平,所以方括号中的地址就是0xfffffff0,此处是一条跳转指令jmp far f000:e05b ,这个地址指向了ROM-BIOS.
此时,Bochs停了下来,在等我们的调试命令。
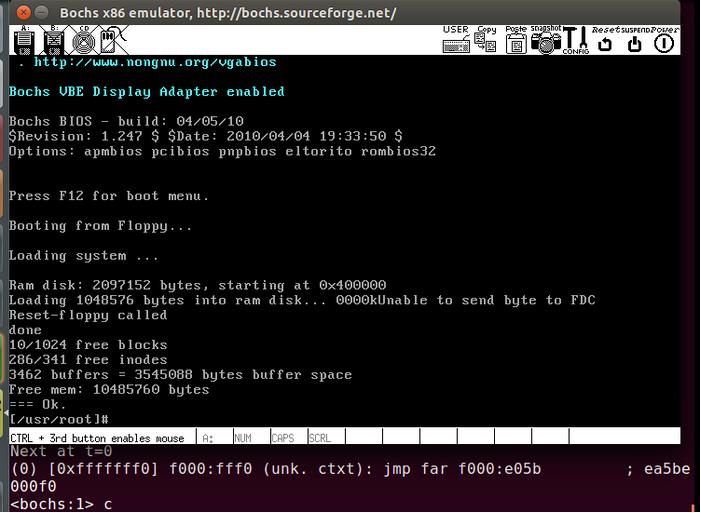
我们输入c(表示continue),回车
注意看Bochs的窗口,可以看到Linux-0.11启动了!最后的画面是:

Linux-0.11启动后
哈哈,是不是很惊喜?
Linux下bochs源码安装与测试:http://www.linuxdiyf.com/linux/14964.html
Ubuntu编译bochs2.3.5:http://www.linuxdiyf.com/linux/11620.html
Ubuntu源码编译安装bochs 2.4.5:http://www.linuxdiyf.com/linux/11066.html
Bochs在Windows和Linux下配置对比:http://www.linuxdiyf.com/linux/7118.html

